You can record new voice messages for your PBX services or you can upload your own music. These messages can, for example, be welcome messages or recurring messages when the caller is in a queue.
Follow the steps below to Manage sounds:
- Log in to the Admin portal.
- Go to PBX Services.
- Click on Manage Sounds to record or upload a new sound.
Click on the tabs below to read more about the different alternatives on how to record, upload and manage sounds in the Admin portal:
Record your own voice messages
- To record or upload a new sounds go to the tab Sounds.

- And then click on Create a new sound.

Here, you can name the recording. You can also add a description, for example, a transcription. Then you can choose how you want to add the recording:
- Get a call on your landline or mobile to hear instructions and then record the message.
- Upload an audio file. We support the most common audio formats such as MP3, WAV, WMA, RAW, etc.
- You can also select the option to "Skip this step for now".
Once you’ve selected the recording, it appears in the “Manage sounds" list. Sounds that you have created can then be added to the PBX in various places.
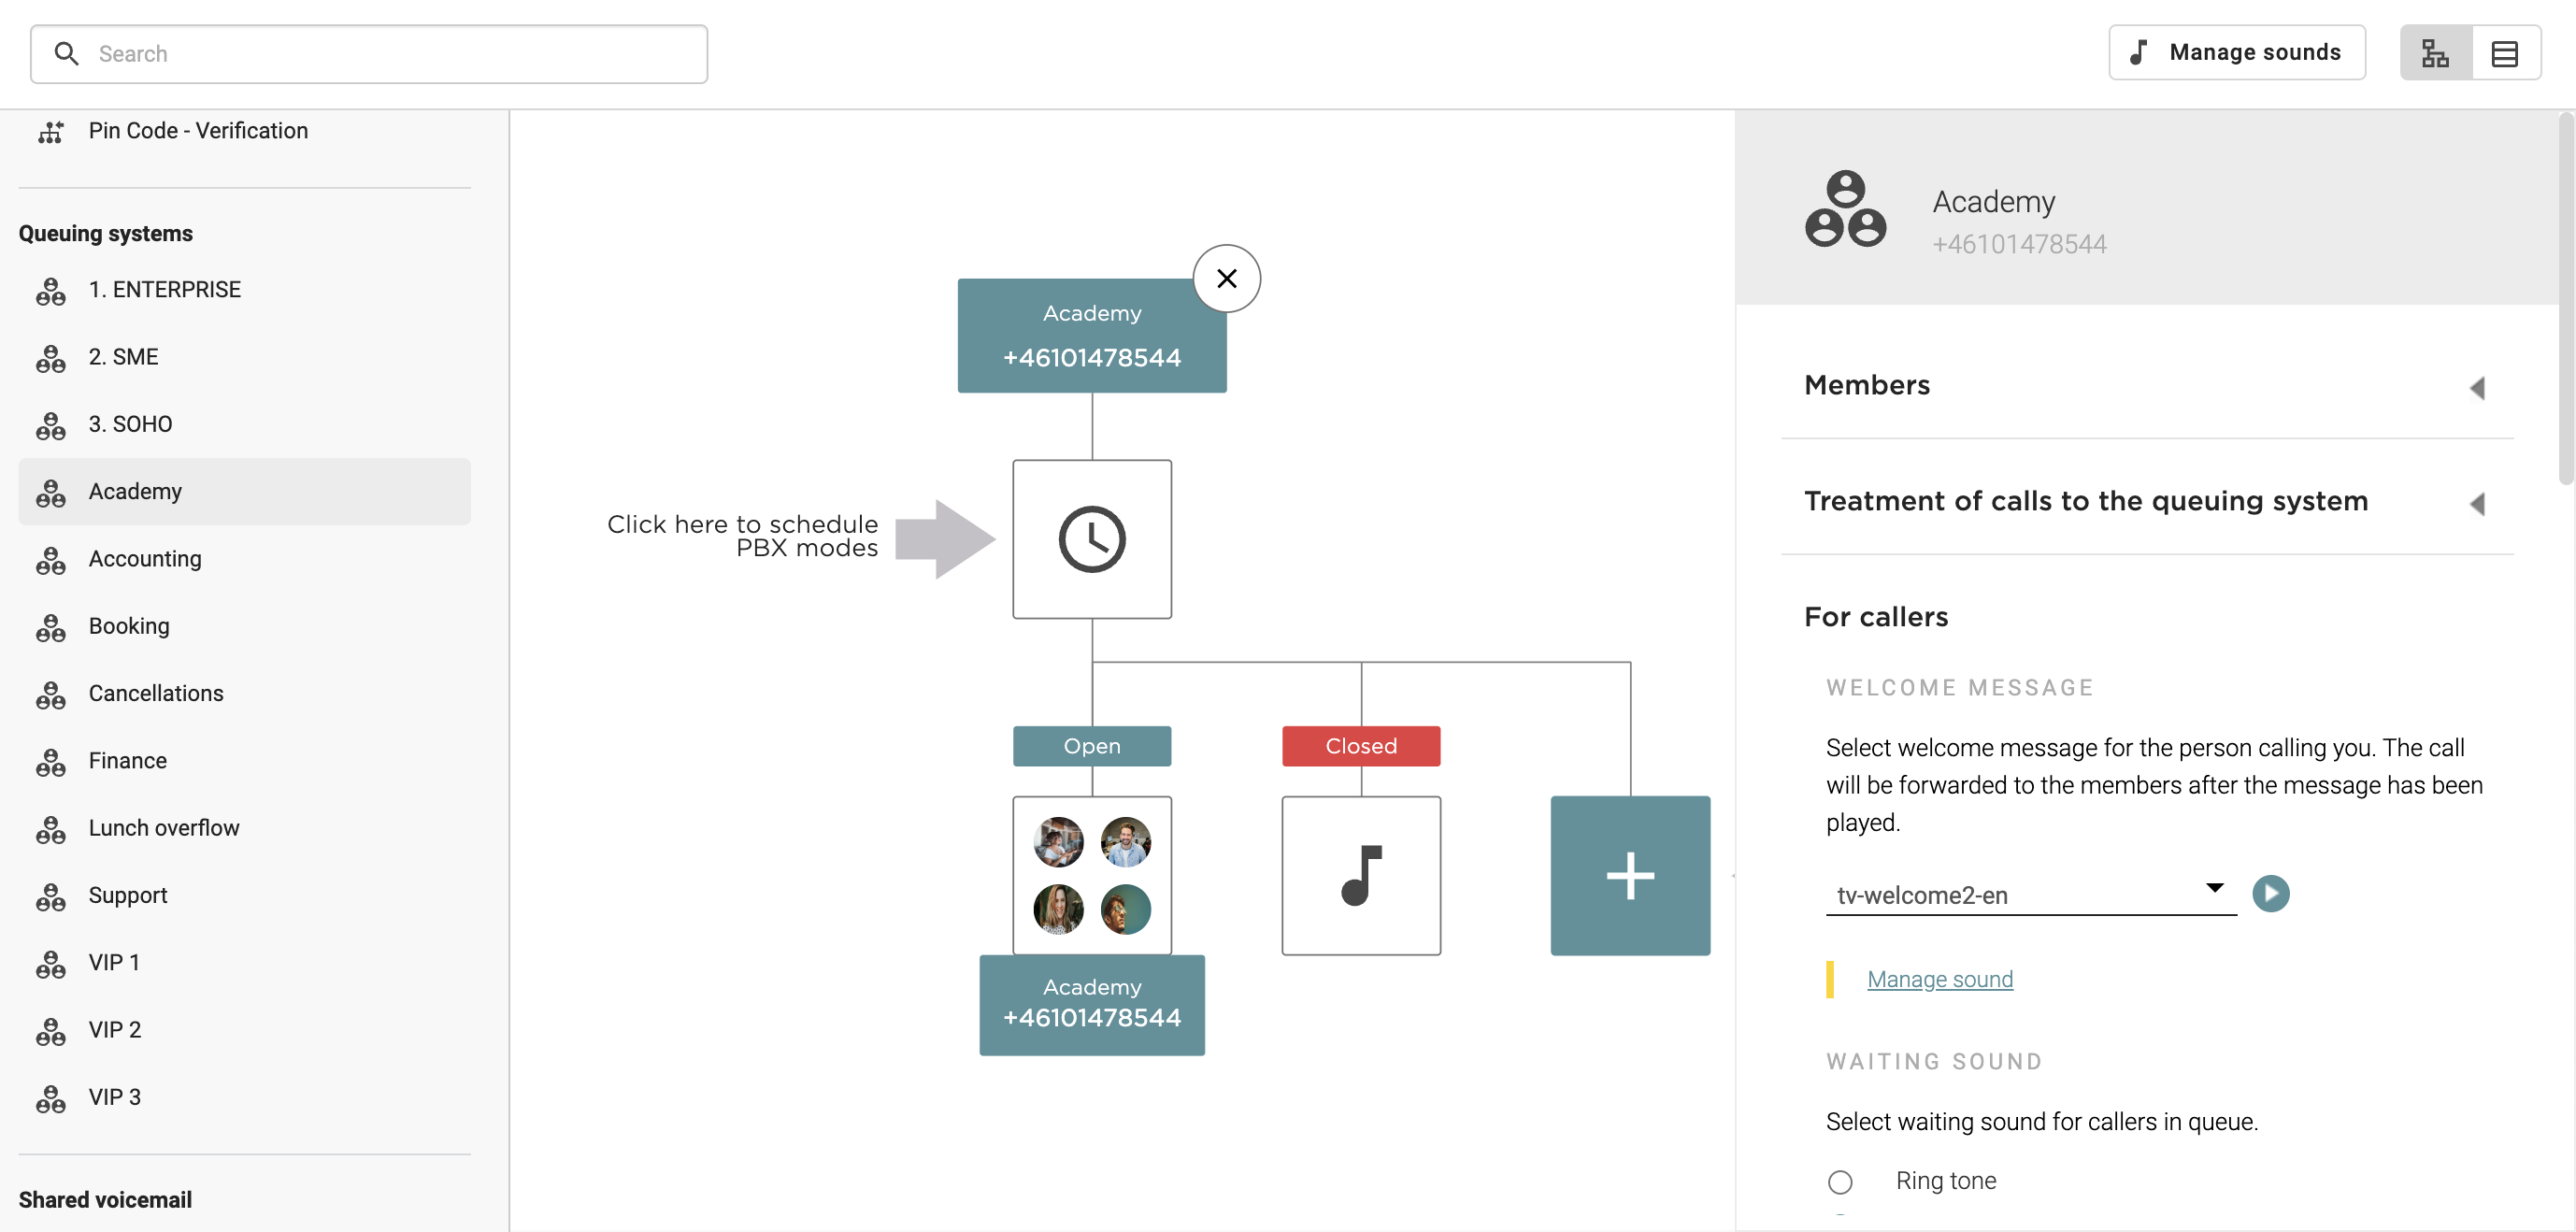
Example 1: Welcome sound in a queue or as a scheduled sound in a PBX mode:

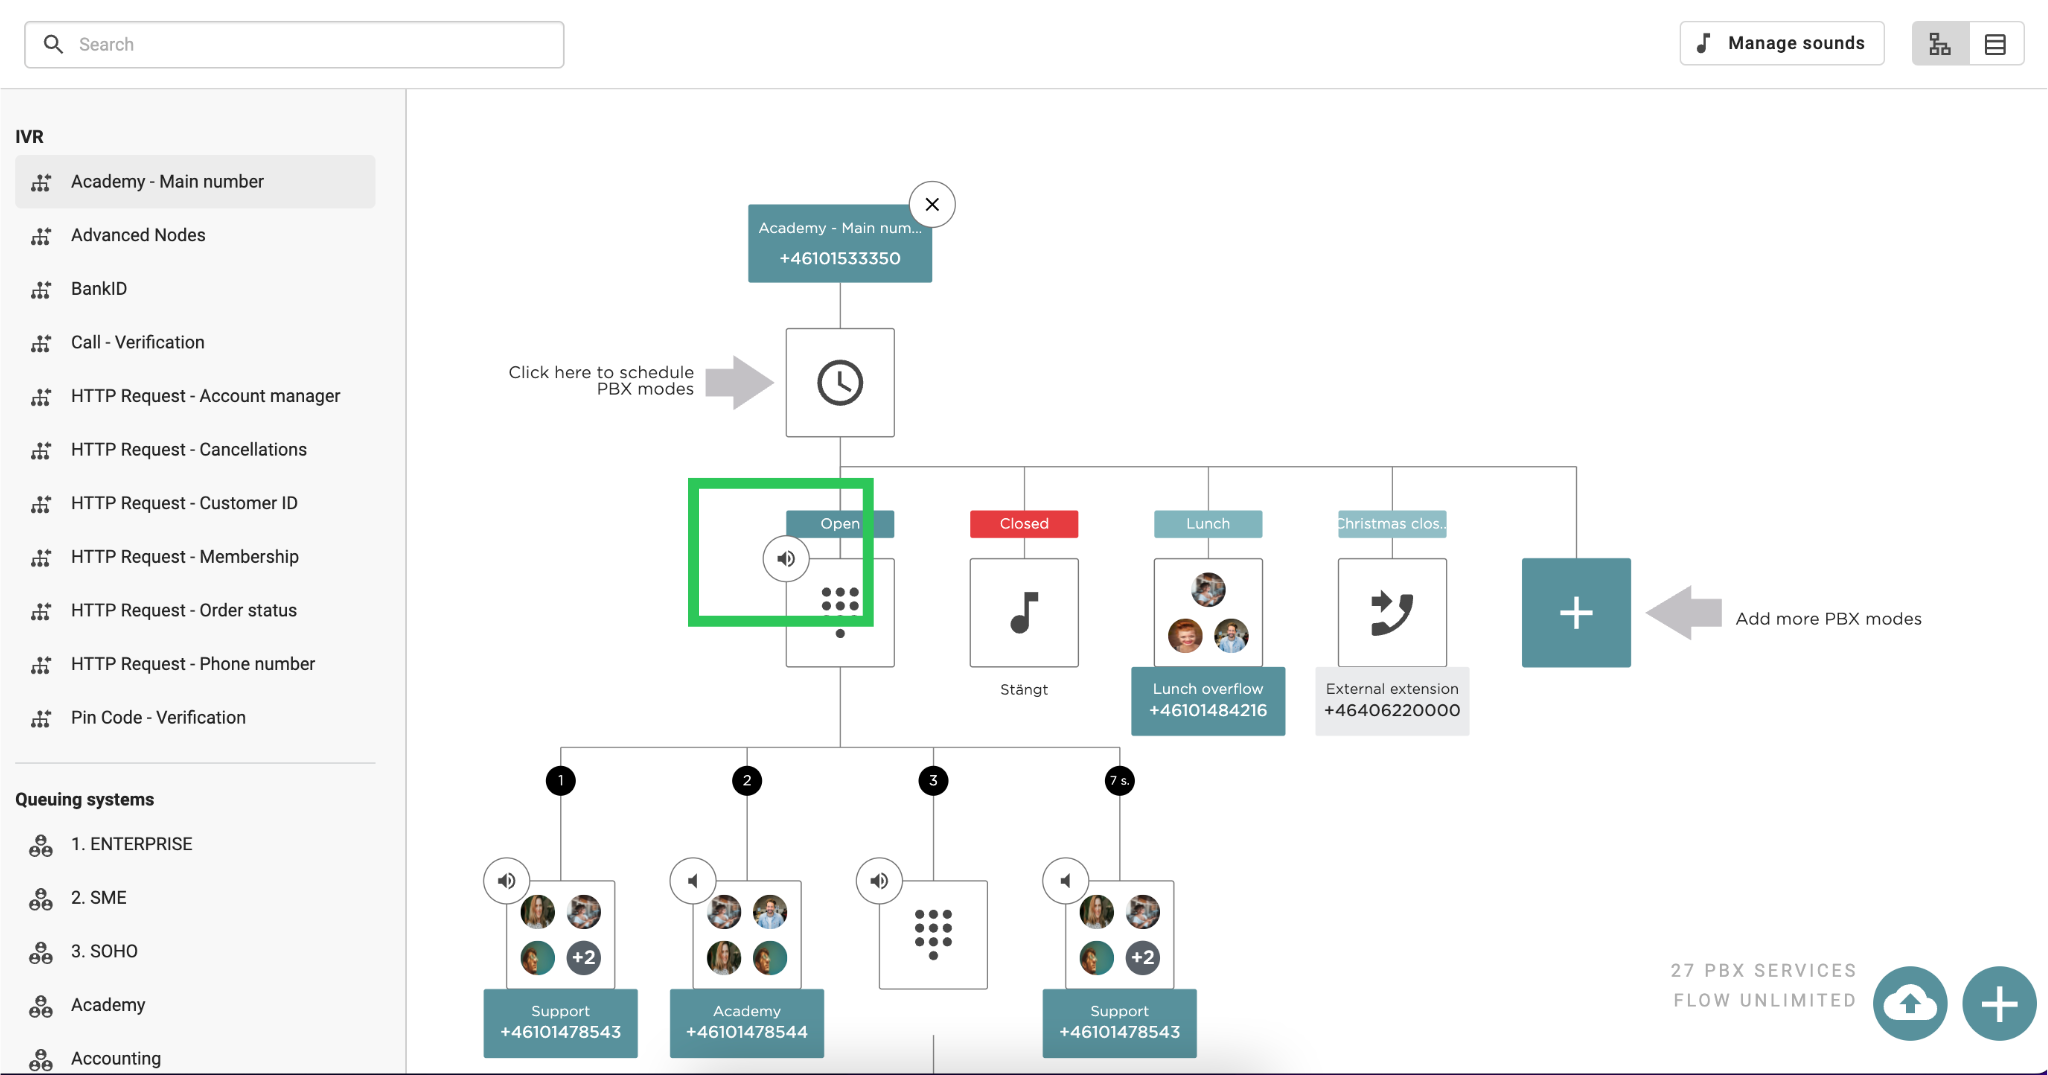
Example 2: Welcome sounds scheduled in an IVR (if you choose to add a welcome sound here, this is the sound that the customer first hears when calling. In the example below, the customer will hear that they have three different choices to make):
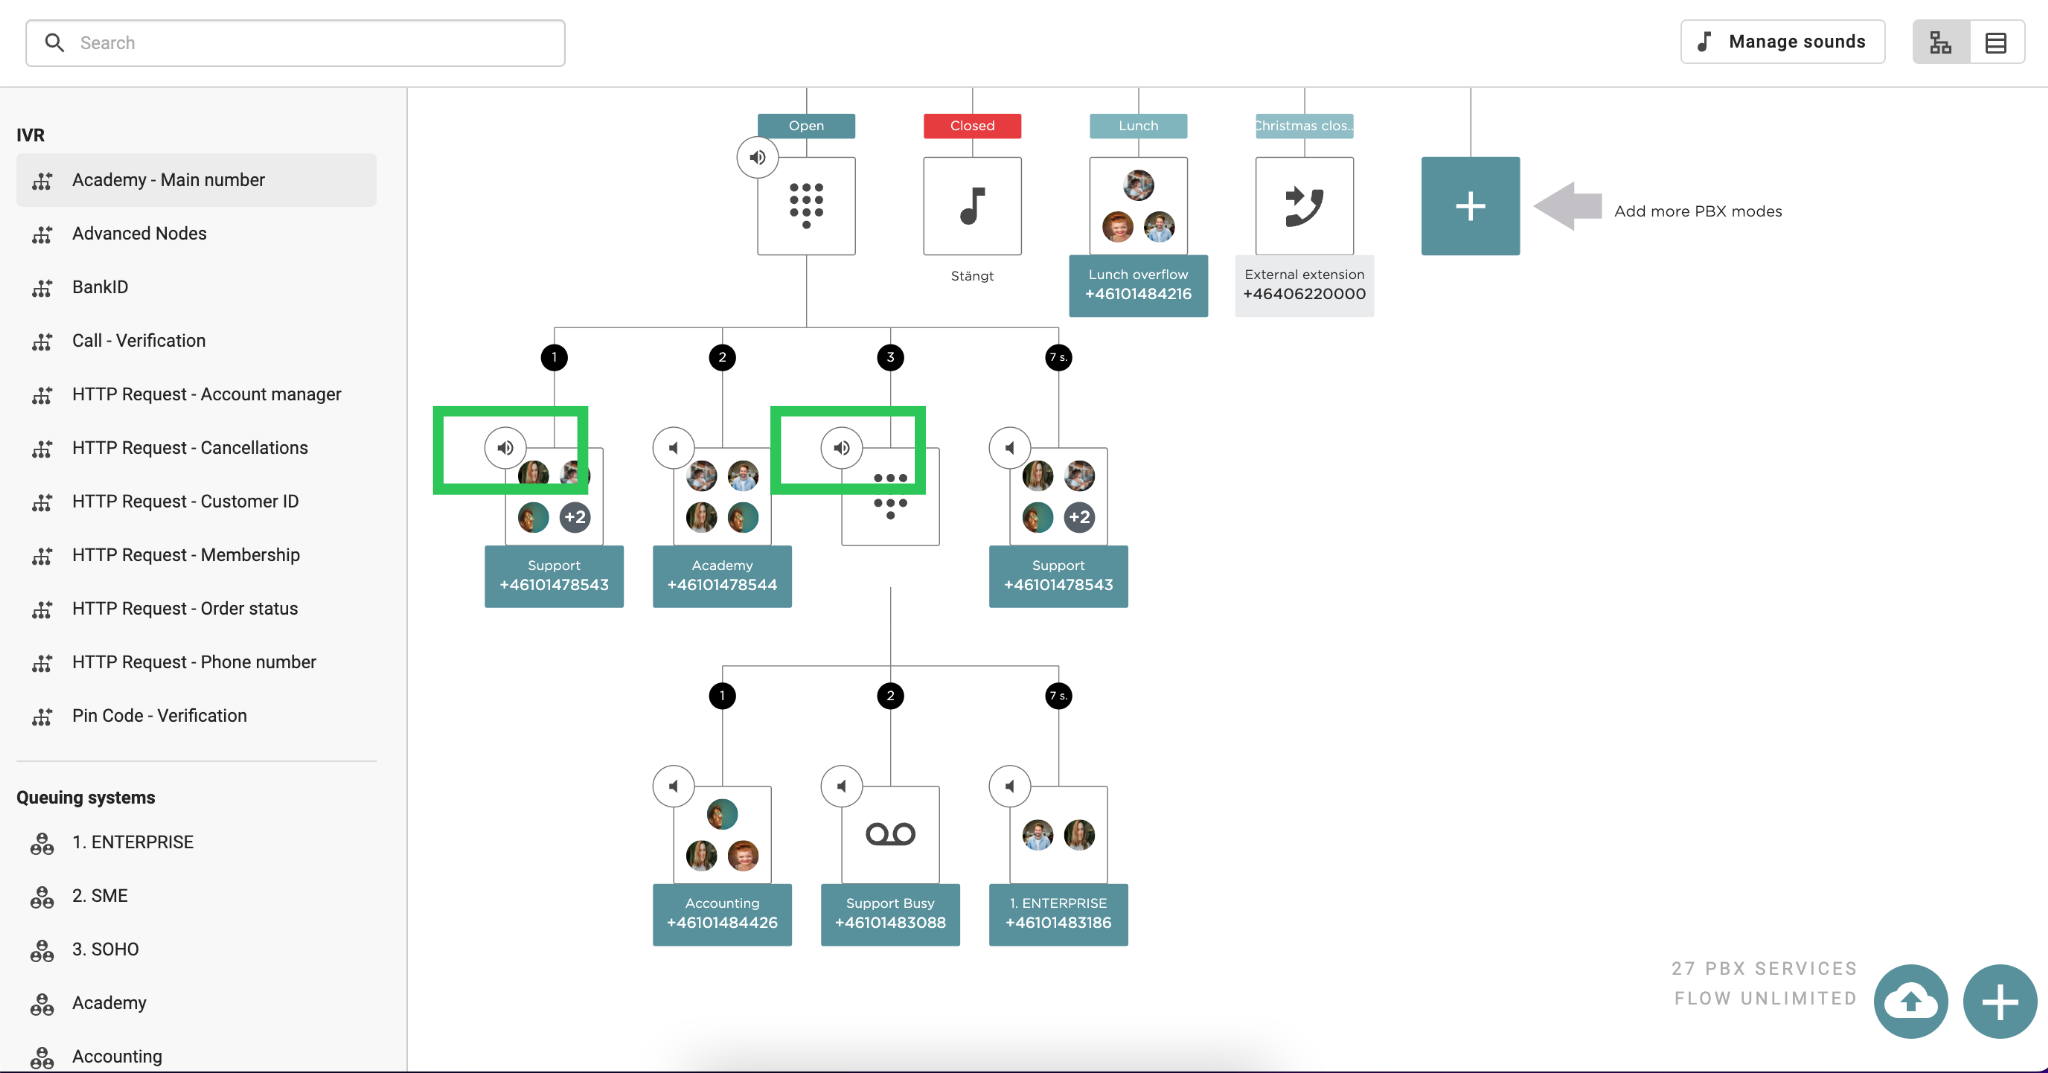
Example 3: Welcome sounds before the caller is forwarded to a specific queue in an IVR (if you choose to add a sound after the customer has been forwarded after making a choice, the customer will hear a welcome sound before they are forwarded to that specific queue or IVR):

You also have the option to purchase professionally recorded sounds from an external company here.
DeleteText to speech
What is Text to speech?
Converts written text into a voice file, making it easier for customers to create PBX messages for the IVR.
How does it works?
Customers can simply write their message, select a language and voice, and generate a professional sound file directly in the Telavox portal.
- Click on Sounds.
- Click on Create new Sound.

- Choose the option Text to Speech.
- Fill in the Name and Description. The description is the text that will be used for sound generation.
- Select the Language and Voice you would like to use.
- Click on Generate Sound and wait for the audio player to show.

- Click on the play-button and confirm that you like the sound. You can change the description and click on Generate Sound again if you would like to test new prompts.
- Click on Create to save the sound.

Once you’ve created the new sound, it appears in the “Manage sounds" list. Sounds that you have created can then be added to the PBX in various places.
Example 1: Welcome sound in a queue or as a scheduled sound in a PBX mode:
Example 2: Welcome sounds scheduled in an IVR (if you choose to add a welcome sound here, this is the sound that the customer first hears when calling. In the example below, the customer will hear that they have three different choices to make):
Example 3: Welcome sounds before the caller is forwarded to a specific queue in an IVR (if you choose to add a sound after the customer has been forwarded after making a choice, the customer will hear a welcome sound before they are forwarded to that specific queue or IVR):
You also have the option to purchase professionally recorded sounds from an external company here.
DeleteUpload your own Music on hold
Music on hold = Waiting music.
- To upload a new sound click on the tab Music on hold.

- And then click on Create a new sound.

- Add a Title to the sound.
- Then under Upload an audiofile choose the file you would like to add. We support the most common audio formats such as MP3, WAV, WMA, RAW, etc.
Once you’ve uploaded the recording, it appears in the “Manage sounds" list. Sounds that you have uploaded can then be added to your queues.
Example: Waiting sound in a queue:
- Click on the queue you wish to add the new waiting sound on.
- Click on the tab Forcallers.
- Choose your new sound under Waitingsound.
