
In Telavox Admin you're able to create and upgrade multiple users at once, to save some time when you need to create or change the licenses for more than one user.
To do this you will need to go through a few steps:
- Order new phone numbers or port existing ones
- Order new licenses
- Create the user accounts (if needed)
- Edit the users contact information & numbers
- Upgrade licenses
And in this article we will guide you through this process so that you can easily manage and create multiple users when needed.
1. Order new phone numbers or port existing ones
First of all you need to either order completely new phone numbers or port in your existing numbers from another operator before connecting these to the new users.
- If you want to order new numbers we recommend that you check our FAQ article Order new numbers
- If you need to port in existing Swedish numbers, you can do so yourself by following the FAQ article Porting Swedish numbers
- If you need to port numbers for other countries than Sweden we recommend that you talk to your support contact person who will be able to help you with this.
After this is done the numbers will be saved as 'Reserved numbers' in your Telavox environment.
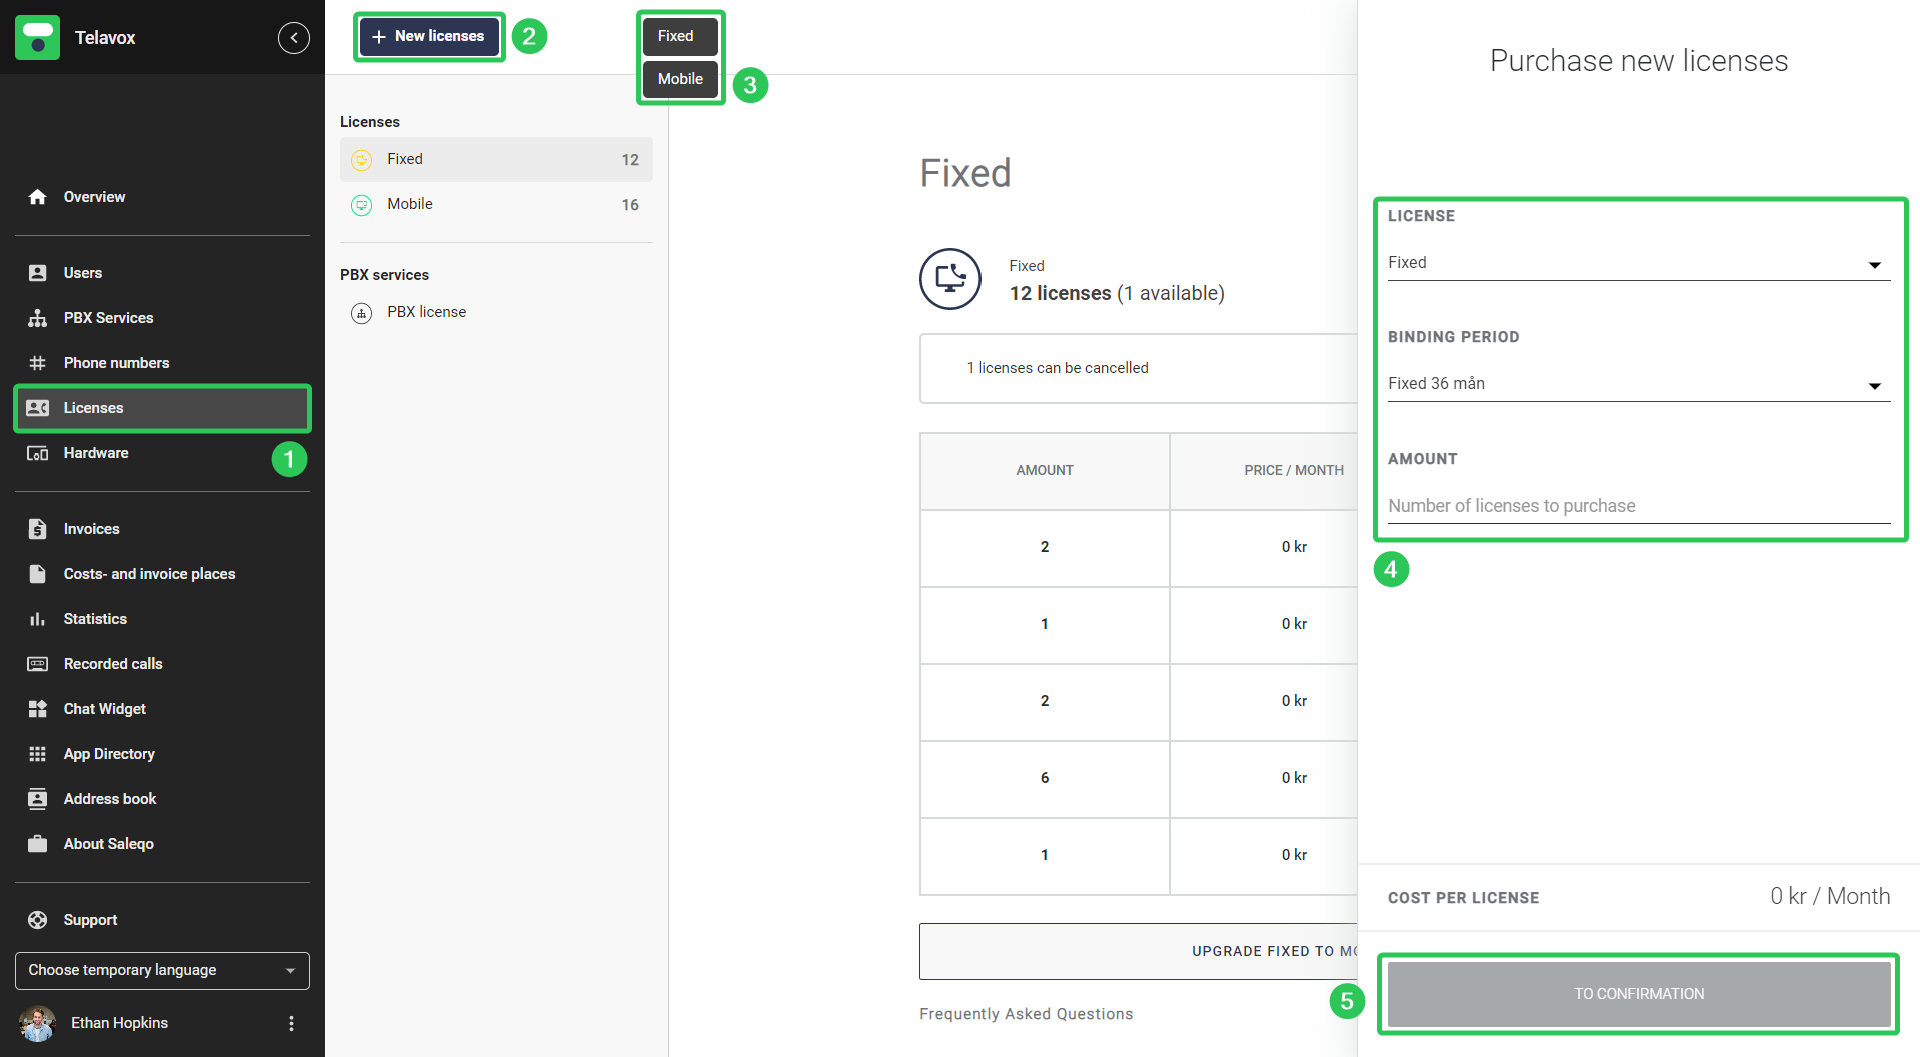
2. Order new licenses
The next step is to order the new licenses. This is done via Telavox Admin:
- Click on Licenses
- Click on New licenses
- Choose a license type
- Choose the binding period and the amount of licenses you wish to order
- Confirm the order
3. Create the user accounts
The next step is to create the user accounts. To create multiple accounts at once you:
- Click on Users
- Click on New user
- Click on Create multiple users

You will then be met by the following window.
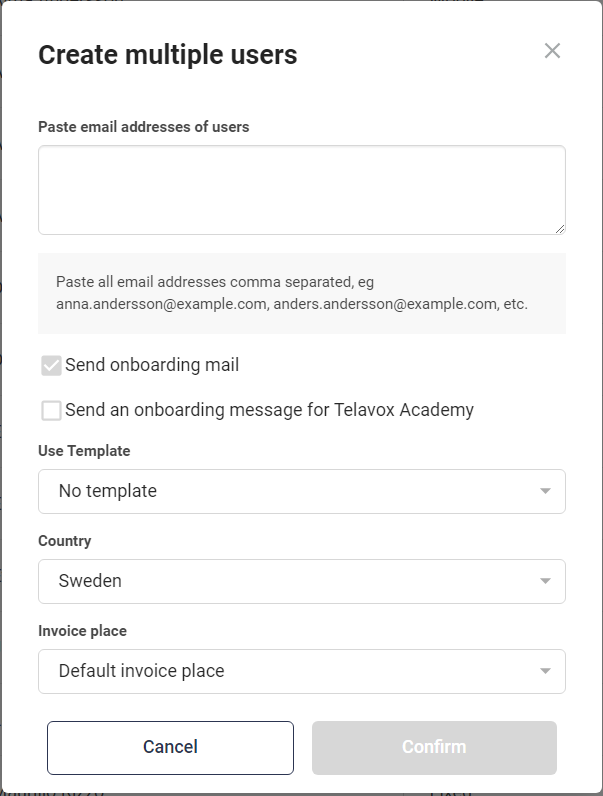
Simply add the email addresses of all of the users you wish to add separated by commas (just as shown in the example above) and then choose a template if you would like to use one, the country that the users should be connected to and an invoice place and then click Confirm to create the user accounts.
If you have a Microsoft Active Directory Sync that's active on your Telavox environment you will have an extra checkbox in this window which you can check if you'd like the users contact information to be automatically retrieved from your AD. This will work as long as the email addresses in your Telavox environment and your AD matches. Click here for more info about Microsoft Active Directory Sync
4. Edit the users contact information & numbers
The next step is to edit the contact information for the users. This includes the users name, phone numbers and other contact information.
If you want to edit multiple users at once the easiest way to do so is to configure users via an external Excel-file. You can read more about this in our guide Configure users via external file
If you want to edit the contact information for only a few users, you can also do this manually via Telavox Admin by going to Users > Contact details and simply mark and edit the users you wish to update the information for.
If you have a Microsoft Active Directory Sync that's active on your Telavox environment but you didn't choose to activate it in the previous step you're also able to import the users contact information afterwards. To do this we recommend that you follow our guide Microsoft Active Directory Sync
5. Upgrade licenses
The final step is to upgrade the licenses for the users. To do this you need to:
- Click on Users
- Click on License and number
- Mark the users you wish to upgrade
- Click on Change License
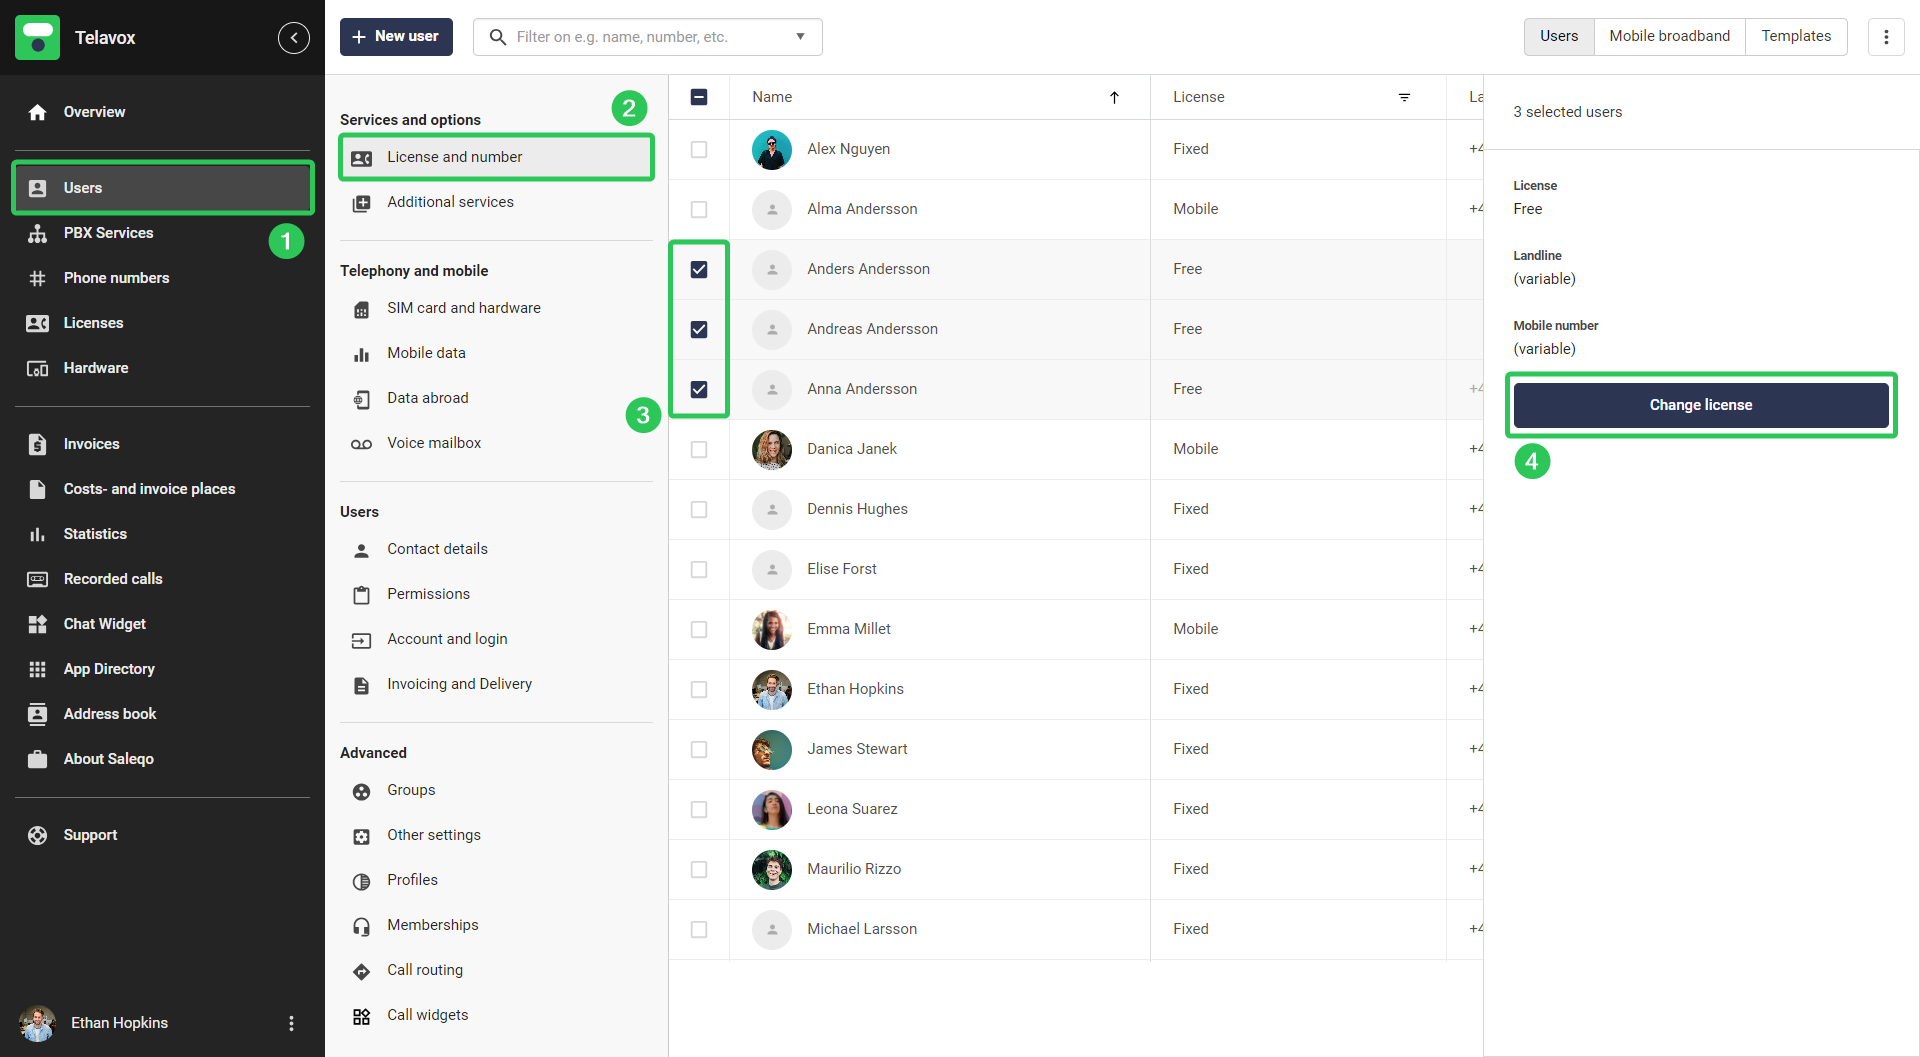
In the new window that appears you simply choose the license type you wish to apply to the selected accounts and then press Confirm.
You are now done! And if you followed the steps the users will be upgraded to the correct license types, with the correct contact information and the correct phone numbers, and the users are now free to start using their new accounts.