Advanced Nodes are building blocks in the Telavox PBX builder which are used to enable advanced workflows into your IVR (button choice). There are multiple different advanced nodes that can be used in combination with each other. Below you'll see four advanced nodes, explanations of what they do, and how they're used. At the end of this article, you'll see some examples of how these advanced nodes can be used together with each other. For more information, please click here to access our Advanced Nodes product leaflet!
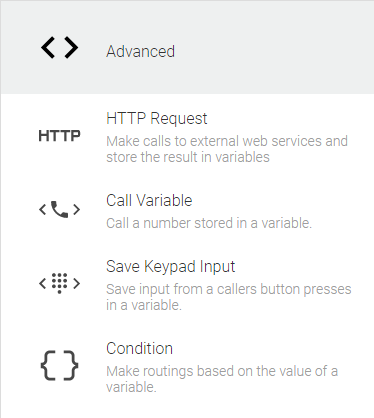
To enable advanced nodes you'll have to navigate to the App Directory in the Telavox admin portal, choose All apps and then locate the Advanced Nodes app. After adding the app you'll find the advanced nodes by navigating to PBX Services > Choose an IVR > Press one of the button choices > Choose Advanced in the right side menu.
HTTP Request
This node is used to make requests to external web services and then store the returned result in a variable. This variable can then be used in Call widgets or in combination with other advanced nodes. Below you can see the configurable settings for the HTTP Request node.
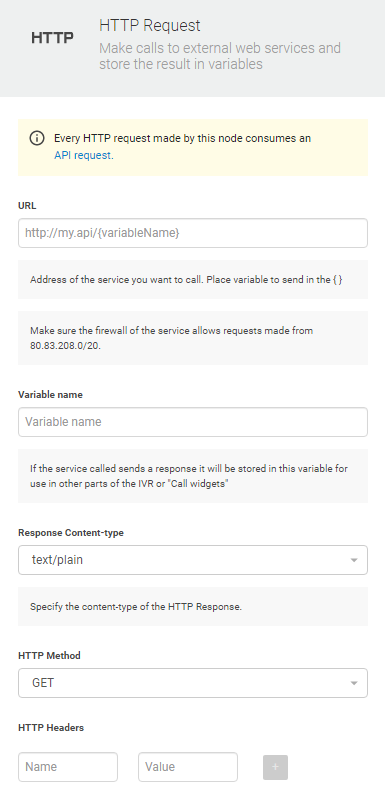
URL: This field is used to specify which URL the HTTP request should be sent to. In this URL you can use a variable by enclosing it in curly brackets {}. There is for example a default variable that is {system.caller} this variable will be populated with the number of the caller in E.164 format. (e.g. +46706170786).
The system that the request is sent to could be your own, or the API of a supplier that you use. Keep in mind that the request is sent from Telavox network which means that the system needs to allow requests made from the network 80.83.208.0/20.
Variable name: Name the variable that will be populated with the response of the HTTP request. This name you can re-use later in other Advanced Nodes or in Call widgets.
Response Content-type: For this field, you have two options text/plain and application/json. If you choose text/plain the entire body response of the HTTP request will be stored in the variable you entered in the 'Variable name' field.
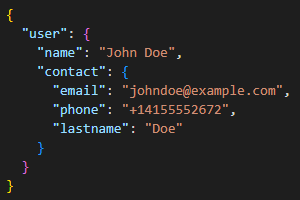
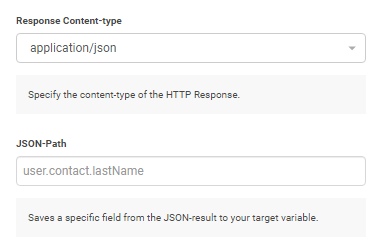 If you choose application/json you'll be presented with a new setting titled JSON-Path as you can see above. You should choose this option if the response of the HTTP request will be formatted in JSON. The JSON-Path setting is used to specify which part of the JSON response should be stored in your variable since this node only stores one variable.
If we take the example in the image above for JSON-Path which is user.contact.lastName this path could be used if the JSON response was formatted as below. In this case, we would store the value "Doe" in our variable since lastname has that value in this JSON response.
If the API you send your request to is configured to respond with an array then it is still possible to specify the path. For example, if the API would respond with a JSON response similar to what is shown in the image below:
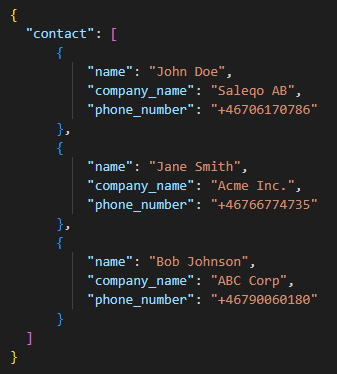
Then if we would like to set our variable to the phone number in the first array we would specify the JSON-path as contact[0].phone_number (if you would want to specify the 2nd or 3rd array then you could just exchange the 0 with 1 or 2)
HTTP Method: For this field you can choose either GET or POST.
HTTP Headers: Here you get the option to input headers into the request if they are needed. You get to enter both Name and Value for the headers. This could be for authentication purposes for example.
Call Variable
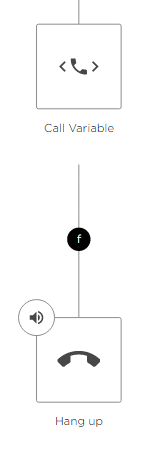
Used to send a call to a number stored in a variable. For example, if you use the HTTP request node to retrieve a phone number you can then redirect the call to that number using the Call Variable node. (there are specific examples at the bottom of this article)

Enter the variable name that contains the number and that's it! Calls that go to this node will be redirected to the number contained in the variable. If the variable doesn't contain a valid number the call will be redirected to the f node below the call variable node. As seen below:
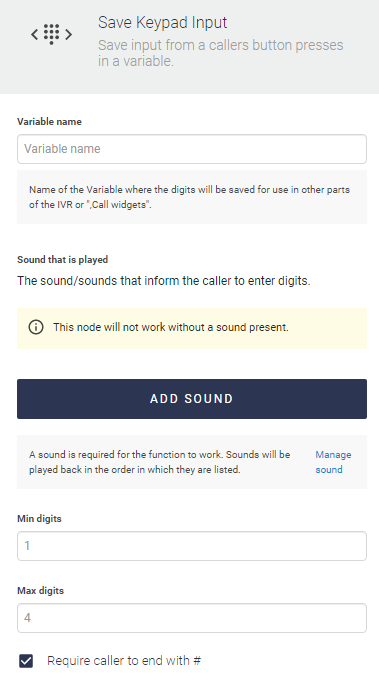
Save Keypad Input
Save Keypad Input is used to store the input of the caller (button presses) in a variable. This node is for example used together with our BankID Integration.
When you have a save keypad input set up in your PBX system, if used together with our call widgets, this is how it can look for the agent, when a customer is calling in after their input:

Condition
The condition node is used to make routings based on the value of a variable. In this node you first enter the variable name that it should look at, then you get to enter the conditions it should be compared/evaluated with. You can press "Read more" to get more information about the different conditions that are available.
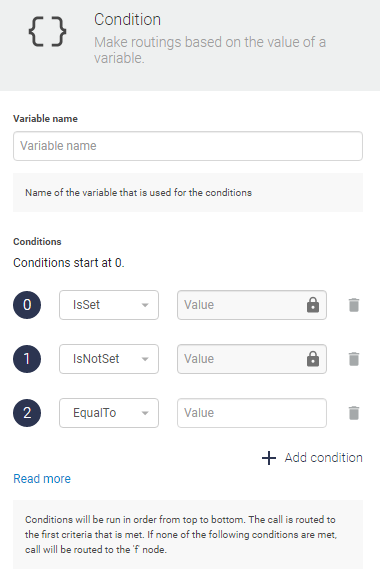
The conditions are run in order from top to bottom. As soon as a criteria is met the call will be routed to that option. Below is an example of how the condition can be set up.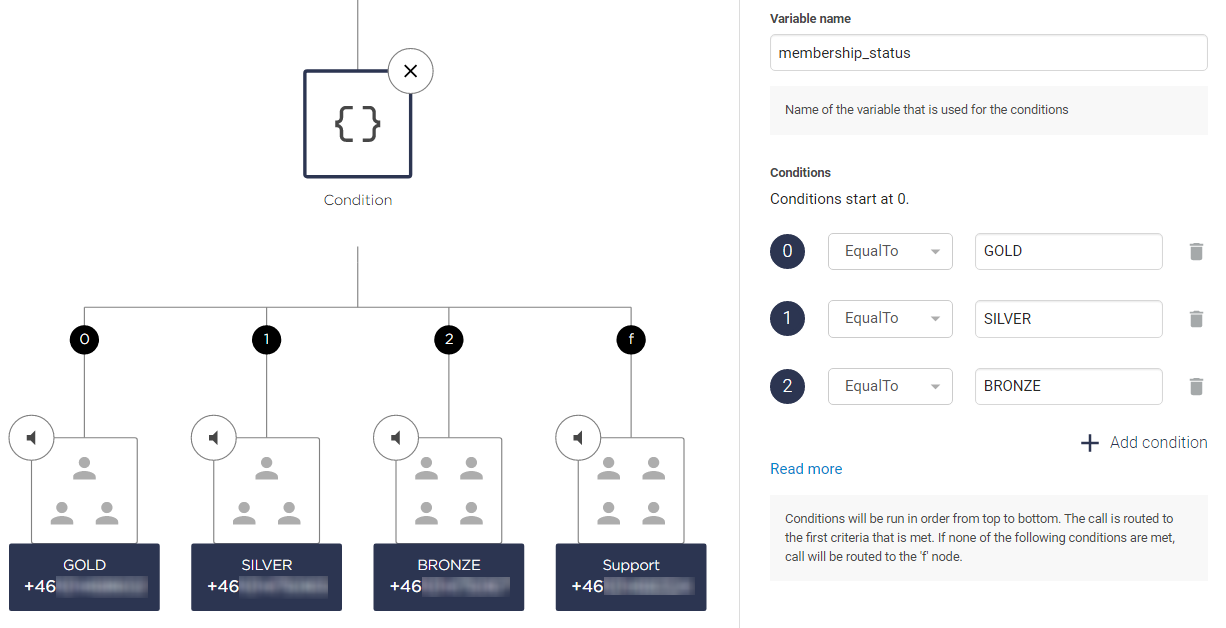
So if the variable membership_status is EqualTo GOLD, SILVER, or BRONZE then the call will be routed to either 0 (GOLD), 1 (SILVER), or 2 (BRONZE). If it is not equal to any of these conditions then the call will end up at the f node, which in this case is set up with the "Support" queue.
Examples
Below are some specific examples of how Advanced Nodes can be used together. You can also find more examples on how to use Advanced Nodes in our FAQ folder Advanced Nodes - recipes.
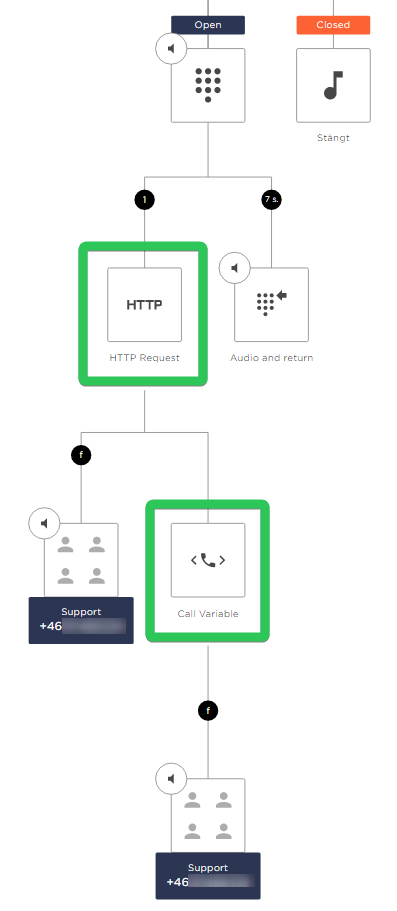
Personal call routing
Using: HTTP Request + Call Variable
Short description: Using the HTTP Request node, send the caller's number to an external system and return the phone number that the caller should be redirected to. Then redirect the caller to that number automatically using the Call Variable node.
PBX image:
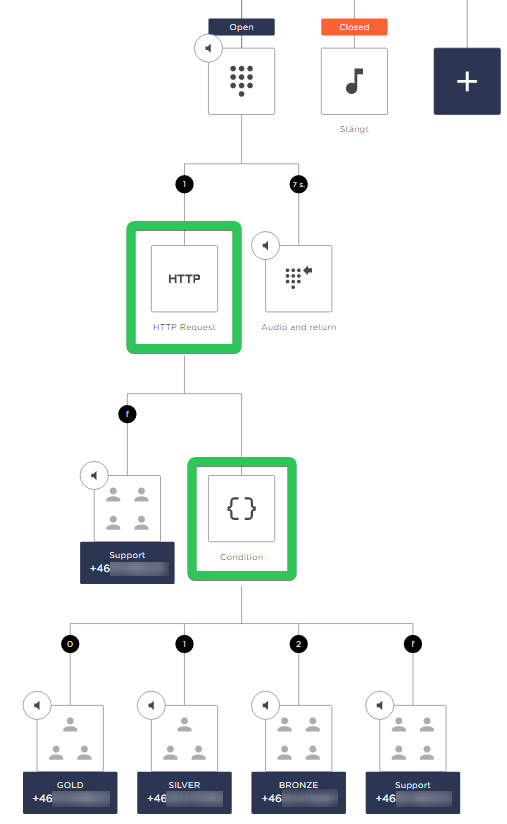
Membership priority
Using: HTTP Request + Condition
Short description: Send the caller's number to an external system and return their membership status/priority, using the HTTP Request node. Then redirect the caller to the appropriate queue, using the Condition node.
PBX image:
PIN code validation
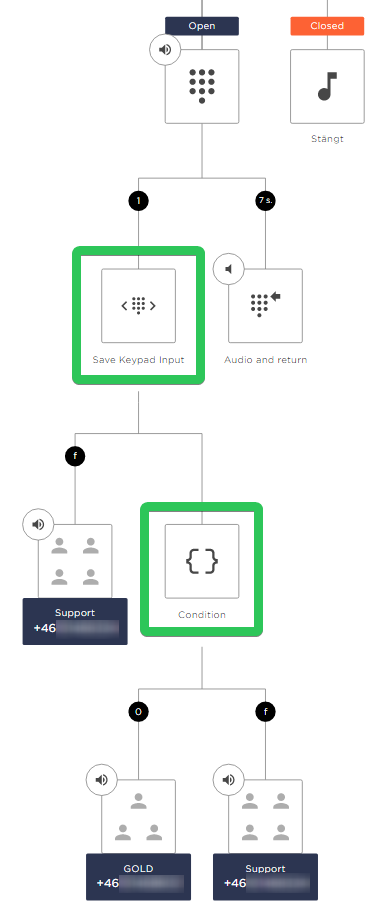
Using: Save Keypad Input + Condition
Short description: Let the caller input a PIN into Save Keypad Input, then validate the PIN using the Condition node.
PBX image:
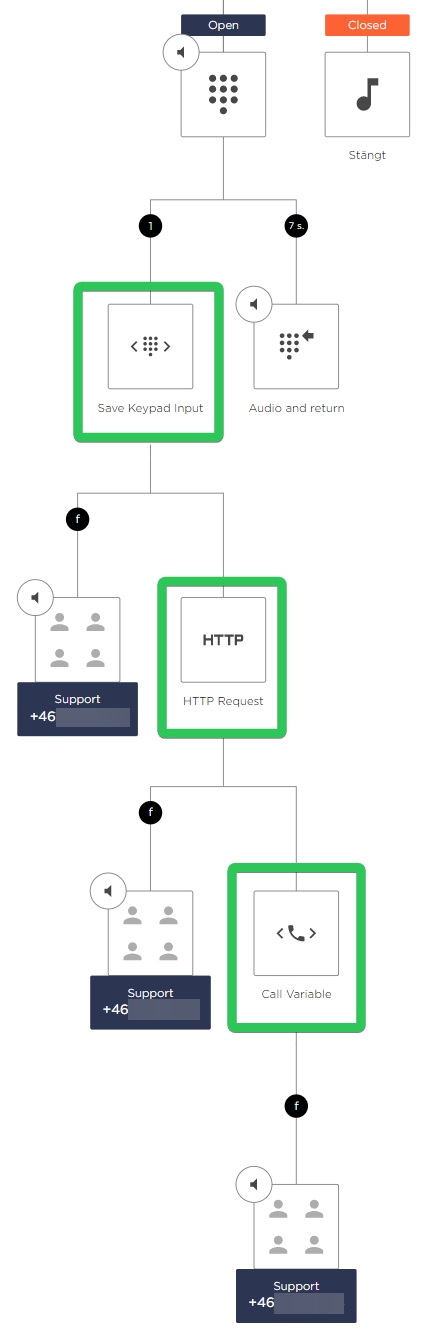
CustomerID routing
Using: Save Keypad Input + HTTP Request + Call variable
Short description: Let the caller input their customer ID in Save Keypad Input. Send the customer ID in an HTTP request to an external system that returns the phone number that the caller should be redirected. Then redirect the caller to that number automatically using the Call Variable node.
PBX Image: