
Call widgets are used to display additional information during a call. You can also use it to open dynamic URL's that are adapted to information related to the call, for example, the caller's number or which queue the call comes from.
They can also be used to display information retrieved from the caller or a 3rd party system by using Advanced Nodes in your PBX together with Call widgets.
Call widgets can be managed directly in the admin portal under Users > Call Widgets > Manage call widgets
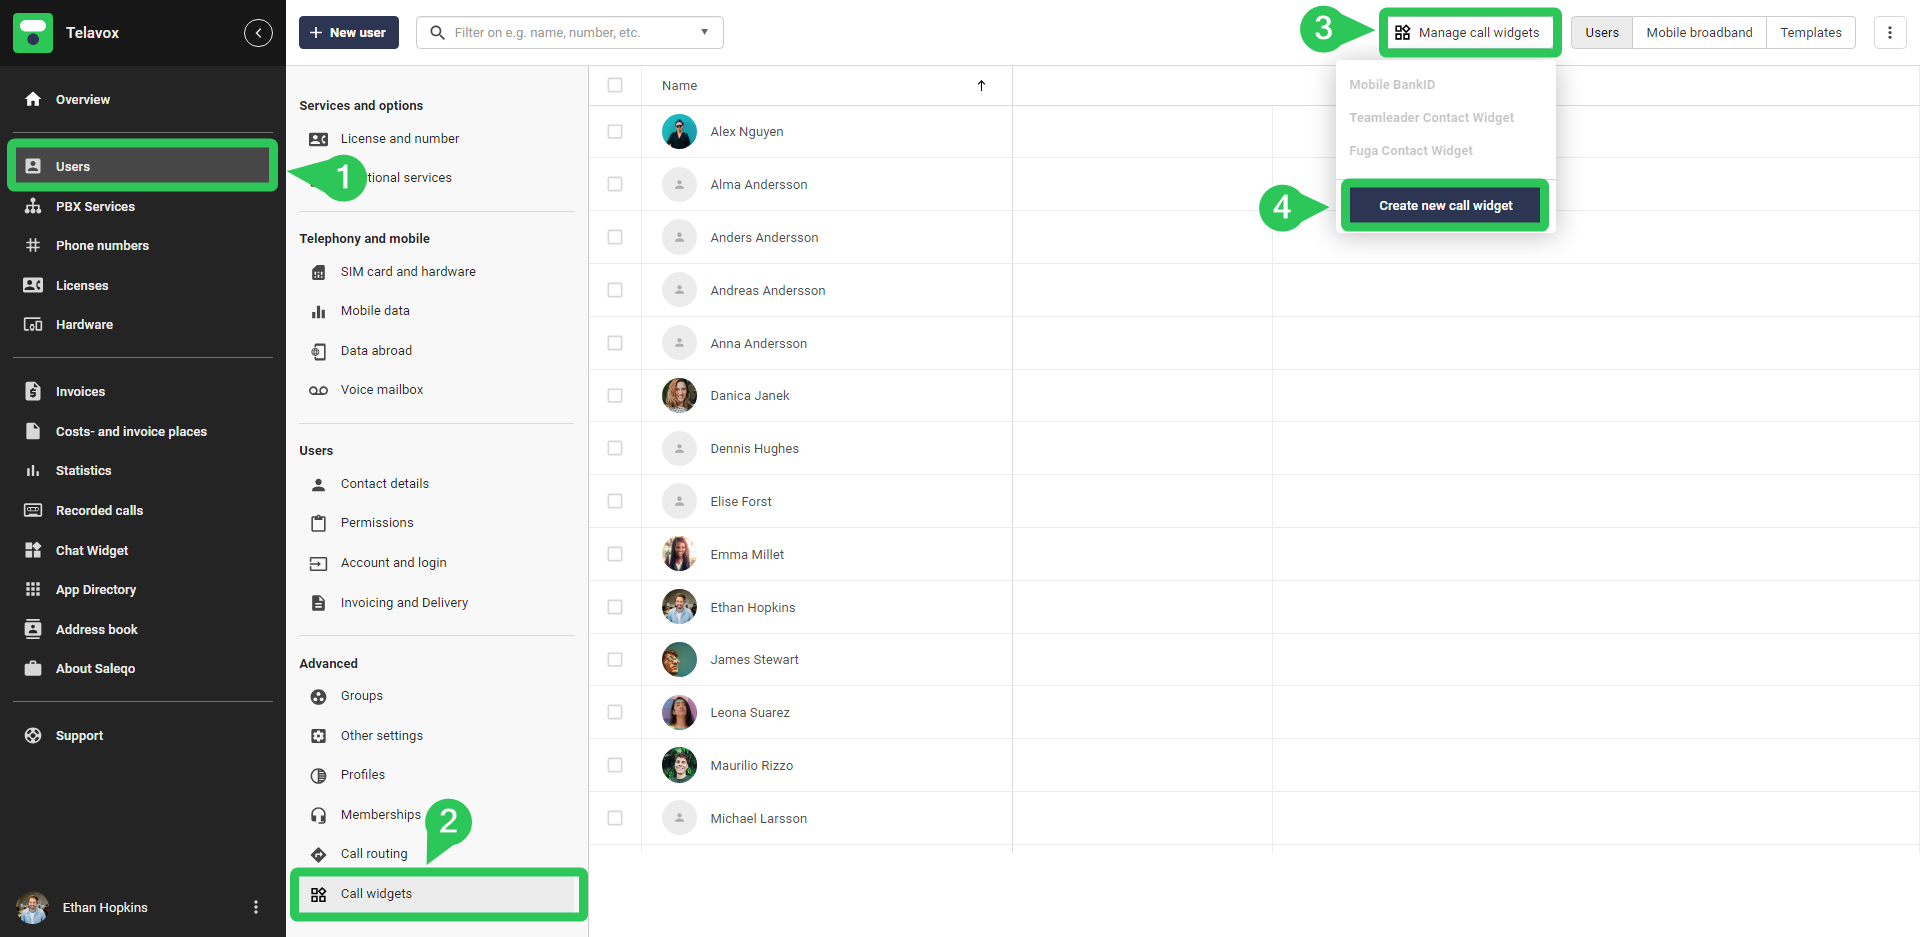
The greyed-out Call Widgets displayed here cannot be changed. They are usually added automatically by integrations that are installed in the App Directory. For example the BankID Integration or a Contact Lookup integration.
Creating a call widget
To create a call widget you press Manage call widgets at the top of the page and then Create new call widget. (shown in the image above)
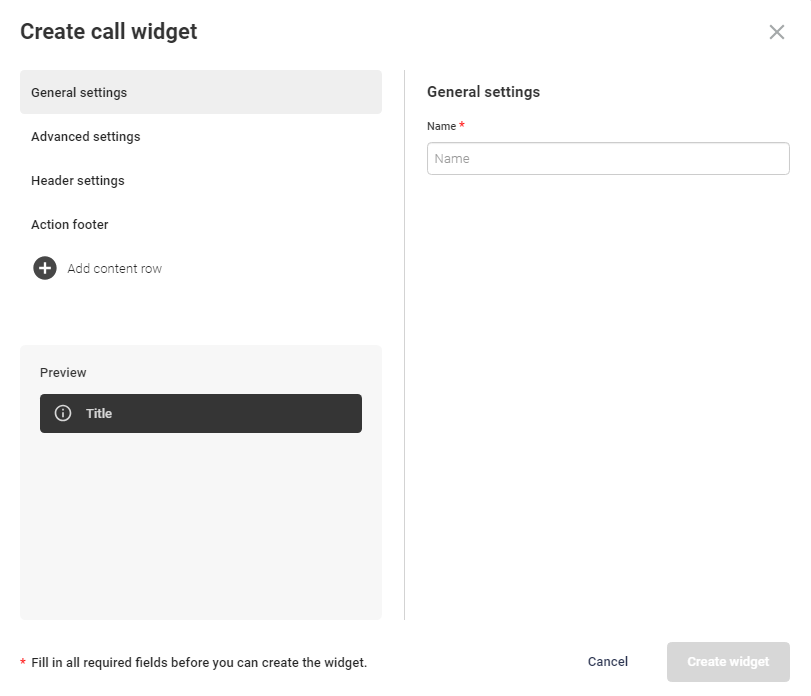
When creating a call widget you will be presented with something we call the Widget Builder, where you can create a customized call widget that fits your need. The first thing you will get to enter is a Name for your call widget, this is only used to keep the call widgets organized and the name is not displayed on the call widget itself.
The next tab will be Advanced settings which has a setting called "Variable to check" this is in case you want the call widget to automatically be hidden if a certain variable has no value. For example, if you require your callers to input a customer id or PIN code when calling you (by using Advanced Nodes) then you can make sure the agent answering the call does not need to see the call widget if the customer hasn't entered their customer id or PIN.

Next, you have Header settings, which is the base of the widget. Here you can add a Title and Action label, which are both displayed on the widget. You also have the possibility to add an Action URL which can either be a static or a dynamic URL. The dropdown for Autorun URL is used to choose if you want the URL to be opened automatically when a call is answered or if you do not answer it. If you dob’t, then you can always still press on the header of the call widget to open the URL.
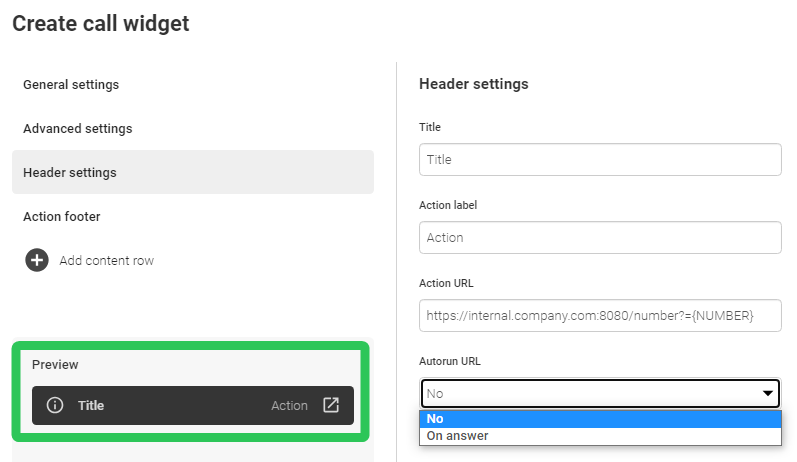
As you can see in the image above you will also have a live preview of how the call widget currently looks. Making it clear what you are changing and how it is impacting the widget that will be used once it is added on users.
To have a dynamic URL you can use variables in the URL. For example you can add the variable {NUMBER} in the URL which will automatically be populated with the caller's phone number. But you can also use variables that you have created yourself in your PBX with Advanced Nodes, as mentioned previously for example a PIN or a customer ID that the customer has entered in the PBX (using Save Keypad Input) or information fetched from a 3rd party system (using HTTP Request). These variables are to be added in the link with curly brackets {variable} or percent signs %variable%
Here are some variables that can be used by default in call widgets:
Mixed format:
{NUMBER} is replaced by the caller's phone number.
{B-NUMBER} is replaced by the phone number that was called.
{C-NUMBER} is replaced by the queue number or the telephone number the call was redirected from.
The variables above are phone numbers, where the format of the number is dependent on the user using them. So if I am a Swedish user and receive a call from a Swedish number then the number will be formatted in the local format (without +46) and if I receive a call from a Norwegian number then it would be formatted in E.164 format (e.g. +47xx).
Then we have the variables below, which will always be formatted with E.164 format.
Always E.164 format (+46xx):
{caller} is replaced by the caller's phone number.
{callee} is replaced by the phone number that was called.
{from} is replaced by the queue number or the telephone number the call was redirected from.
You can also add buttons to your widget, this is done in the Action footer settings. You can add up to 3 buttons. You get to choose a Button label and a Button URL for each. When the button is pressed the URL will be opened, you can use variables in these URLs as well.
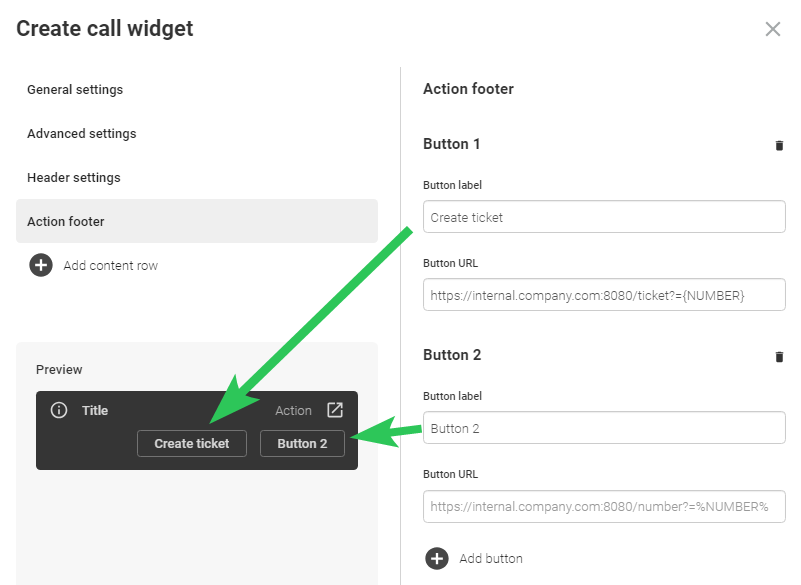
In the image above you can see that I've created two buttons, one labeled Create ticket and one labeled Button 2. They are also instantly shown in the preview while editing!
Lastly, you have Content rows, which you can add if you press "+ Add content row". You can add up to 5 content rows. These are used to display dynamic information taken from variables related to the call. But it is also possible to use them for static information if needed. You can add a Label to the content row which makes it clear what the row is displaying, you can also add an Action URL so that the row is clickable as a button and the URL is opened.
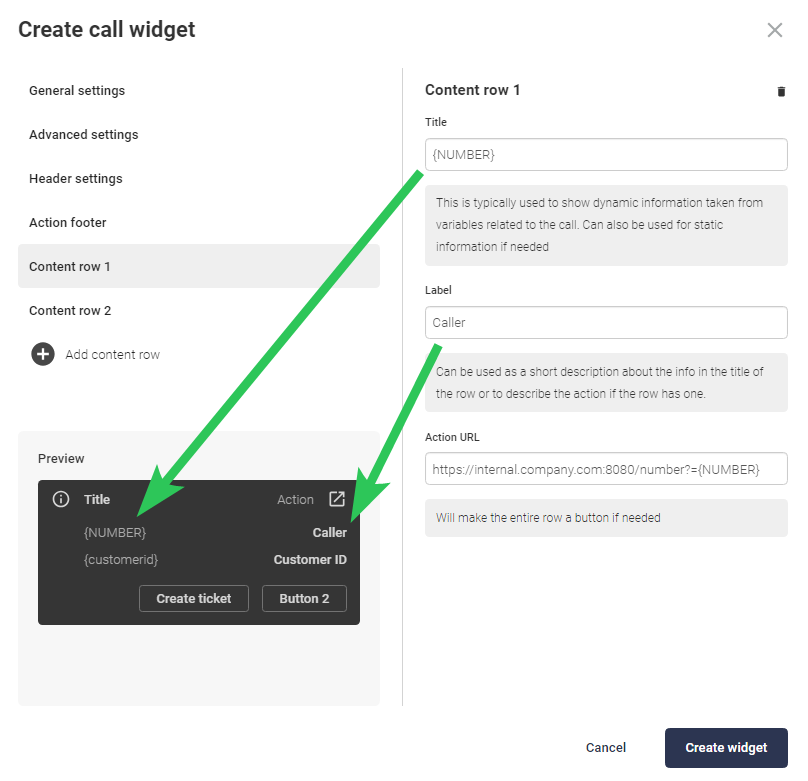
As you can see in the image above, two content rows have been created, one that displays the number of the caller by using the {NUMBER} variable. And one row displays the customer ID of the caller by using the {customerid} variable. Since {customerid} is not a default variable it has to be populated/created using Advanced Nodes to actually have a value to display.