
1. Requirements for an installation in a Portima environment
Internet connection:
If the broker is using an Internet connection provided by Portima, some ports have to be opened by Portima to allow our phones to connect correctly to servers. The broker needs to contact the Portima helpdesk before the installation. This has to be done even if there is no integration between Brio and our company.
Integration with Brio:
The broker first need order the integration on Portima Brio side:
NL: Bestel de telefonie module
FR: Commander le module telephonie
2. Features provided by the Brio integration
This integration includes 2 features:
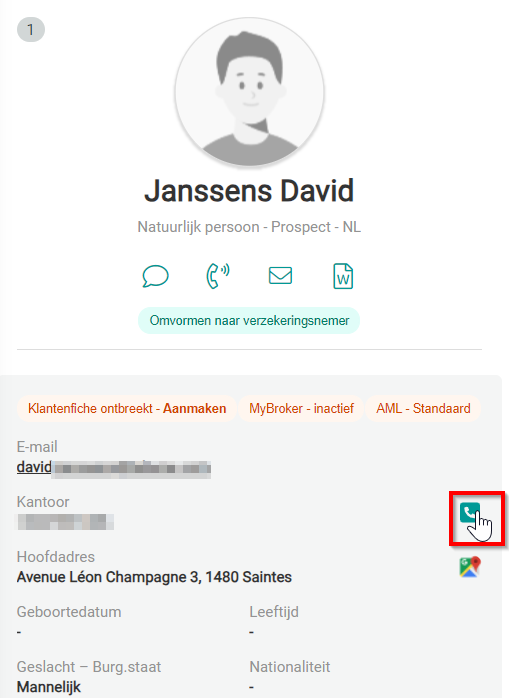
- Click-to-call: The broker clicks on a phone number in Brio and the call is automatically made on the phone.
- Notification in Brio on incoming calls: when a call comes in, the broker is notified and can open the customer record.
3. Configuration required in Brio
In Brio go to:
NL: Profiel → MAKELAAR→ Gegevens - Instellingen
FR: Profile → COURTIER/Signalétique – Paramètres
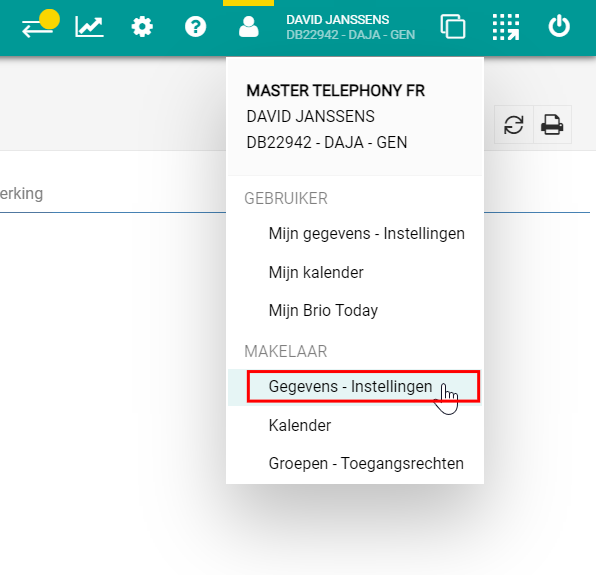
Then select:
NL: Makelaargegevens vervolg
FR: Données courtier suite
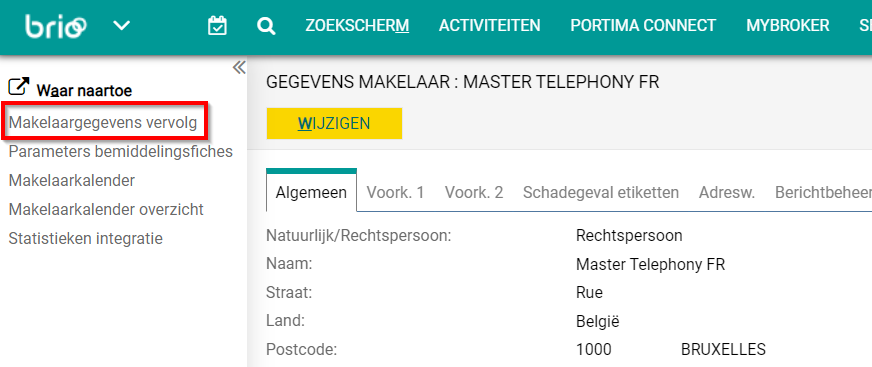
On this page you will see:
NL: Telefonie aanbieder: <geen>
FR: Fournisseur de téléphonie: <Néant>
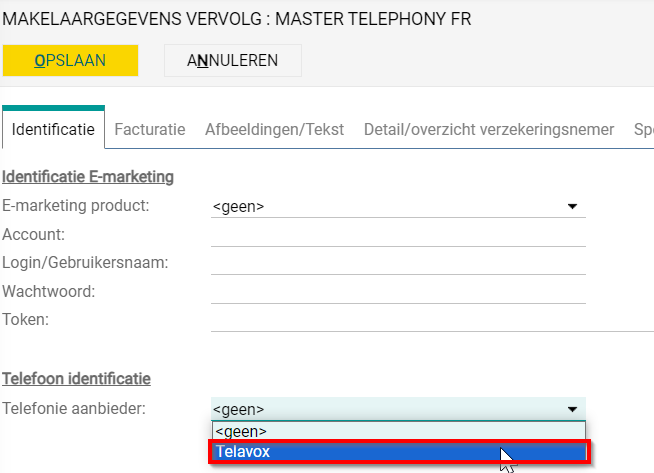
To change this, click on “change” on top of the page, then select “Telavox” in the list and hit the save button.
4. Telavox admin configuration
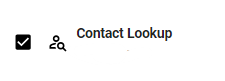
On the Telavox admin side the “contact lookup” need to be activated for all the users that will use Portima Brio integration.
Once logged in on the admin portal, go to:
Users → Additional services
And activate the Contact Lookup for all needed users.
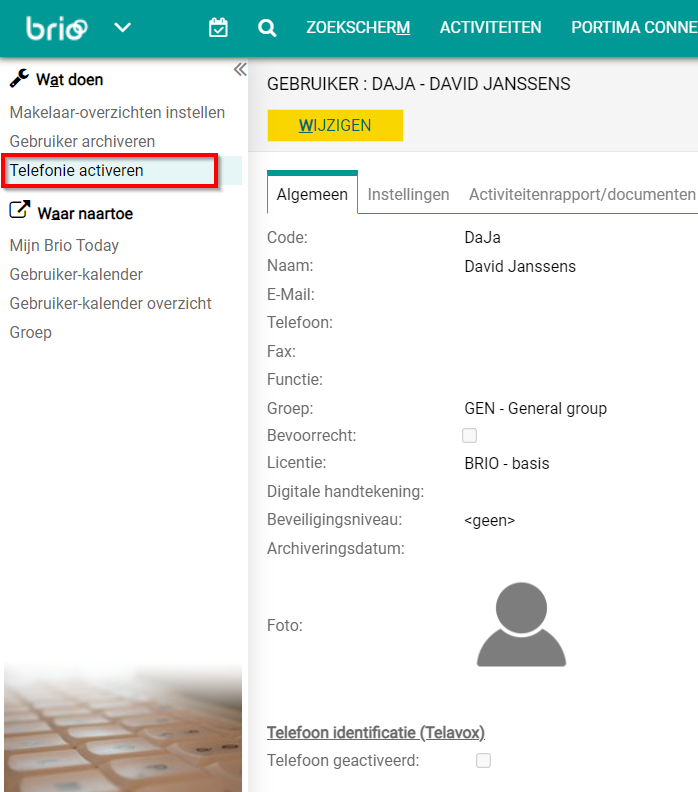
5. User configuration
The previous steps only need to be done once. The next steps need to be done for every user.
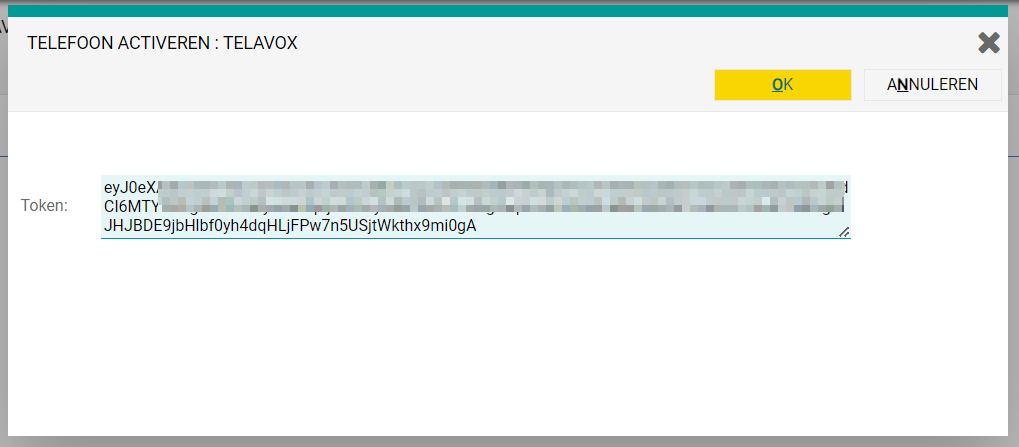
5.1. Create a user token
The user needs to create their own integration token. This can be created from the web or desktop Telavox/Flow application.
In the app go to:
Settings → My Account → Username and Password→ integrations→ Manage tokens
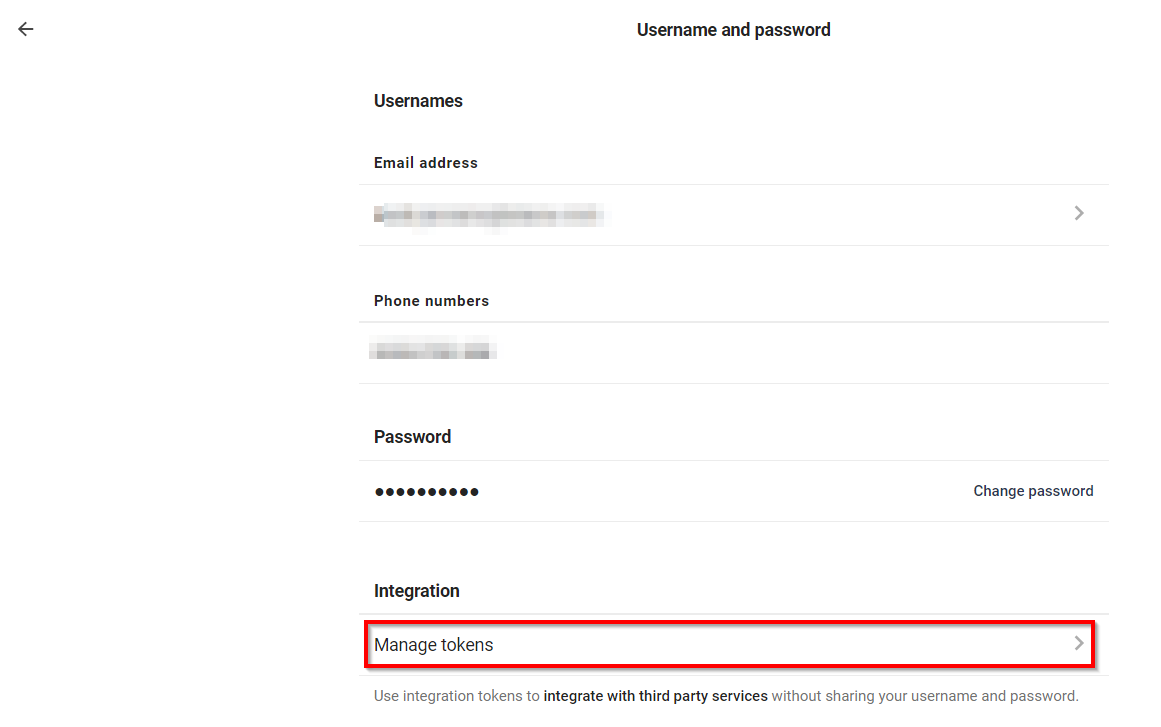
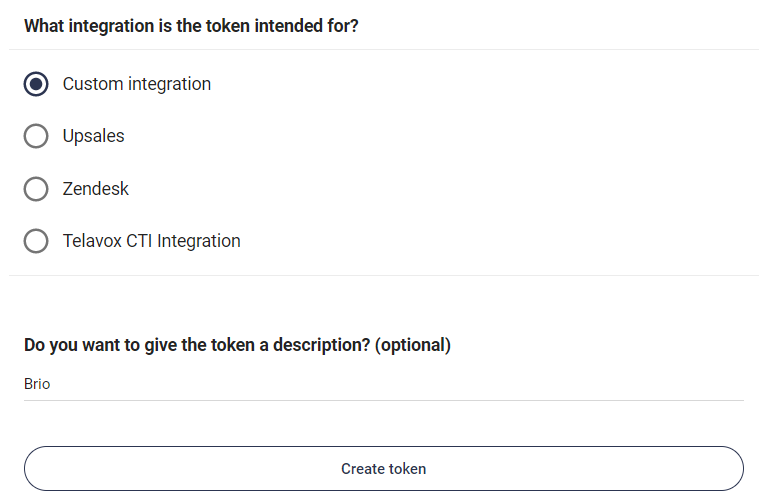
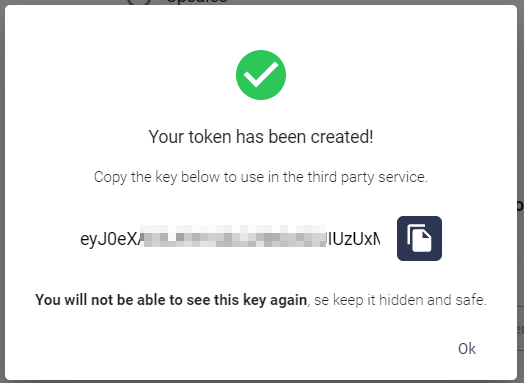
When done, click on “Create Token”. You will then receive your token.
Be sure to save this somewhere safe since you will not be able to see this key again.
5.2. Continue the setup in Brio
Now the user need to go to the user settings:
NL: Profiel → GEBRUIKER→ Mijn gegevens - Instellingen
FR: Profile → UTILISATEUR → Mes données – Paramètres.
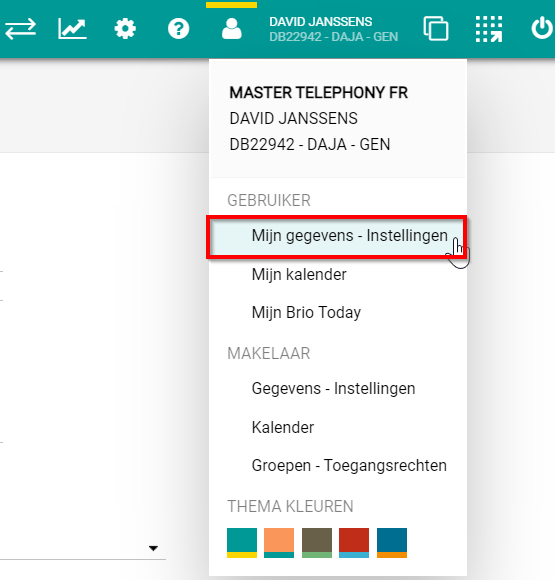
On the left column, select the following:
NL: Telefonie activeren
FR: Activer téléphonie
In the newly opened window, enter the previously created token and confirm by clicking “OK”.
6. Click-to-call:
The broker clicks on a phone number in Brio and the call will be made automatically.
7. Incoming call popup
Notification in Brio on incoming calls: when a call comes in, the Broker is notified and can open the customer record.
If the caller is known:
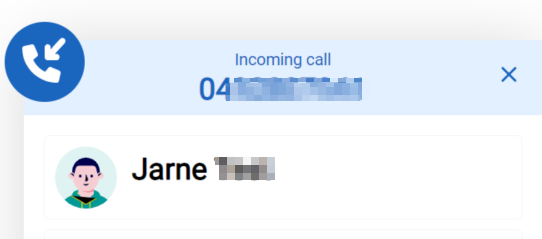
You can click on the caller to open the customer record.
If the caller is unknown:
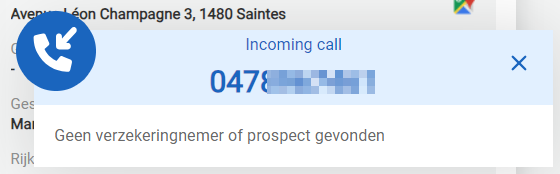
You only see the number from the caller.