
Background
Managing your PBX, especially when you have multiple, can be complicated and time-consuming. With PBX Scheduling, you can mass edit (also known as "bulk editing") all services simultaneously in an easy-to-use table view.
Benefits
- Easier mass editing of PBX services.
- More control of your PBX services as you don’t have to manage individual services.
- Ability to create PBX modes.
Key features
- Select multiple services at the same time.
- Assign and create PBX modes.
- Create and manage events (recurring or one-offs).
- Clear calendars.
How-to guide:
- Navigate to the Admin portal.
- Click on PBX Services in the left side panel.
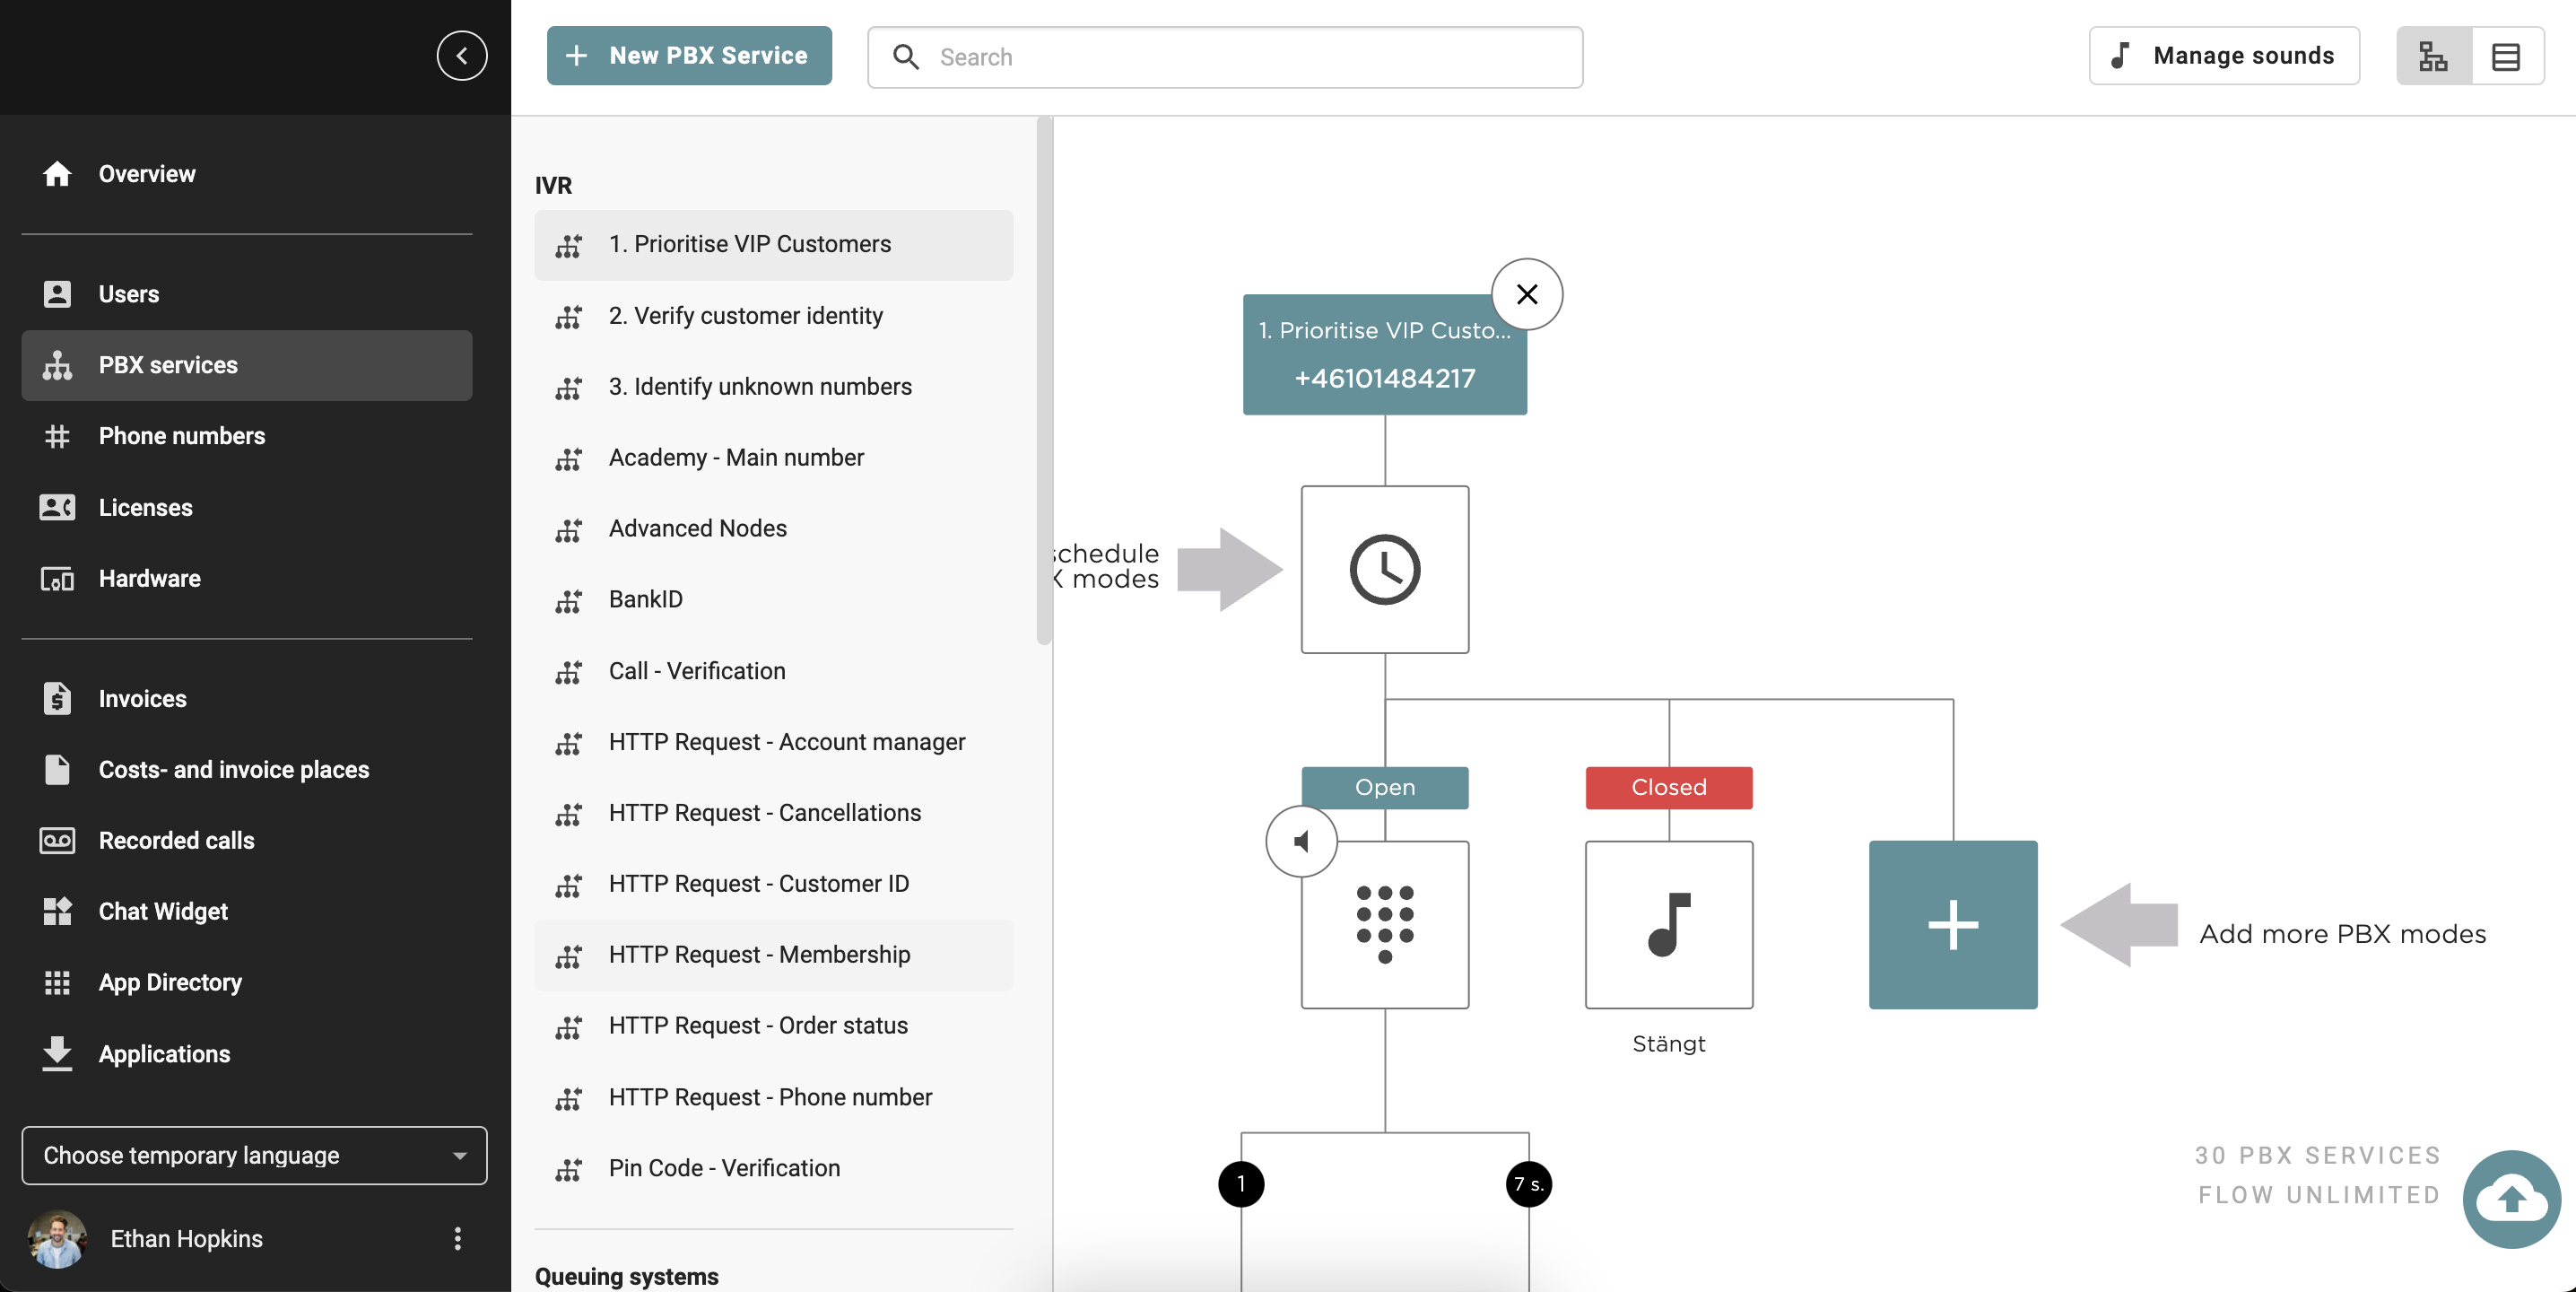
- To see all your PBX services, click on the symbol "Table view" in the top right corner next to the "Graphical view."

Click on the tabs below to learn more about the different settings you can adjust for your PBX services:
Name and number
- Here, you can see all your PBX services, such as Queueing systems, IVRs, your Fax and all Shared extensions.
- You can change Name, add a Email and Keywords to the PBX service as well as Omni channels.
- If you mark one or multiple services, you can mass edit the feature Allow as display number and Hide from apps.
 In the article Profiles, you can read more about how to manage Caller IDs on different profiles in the Admin portal. In the article Choosing your Caller ID, you can read more about how to choose a Caller ID on your devices.
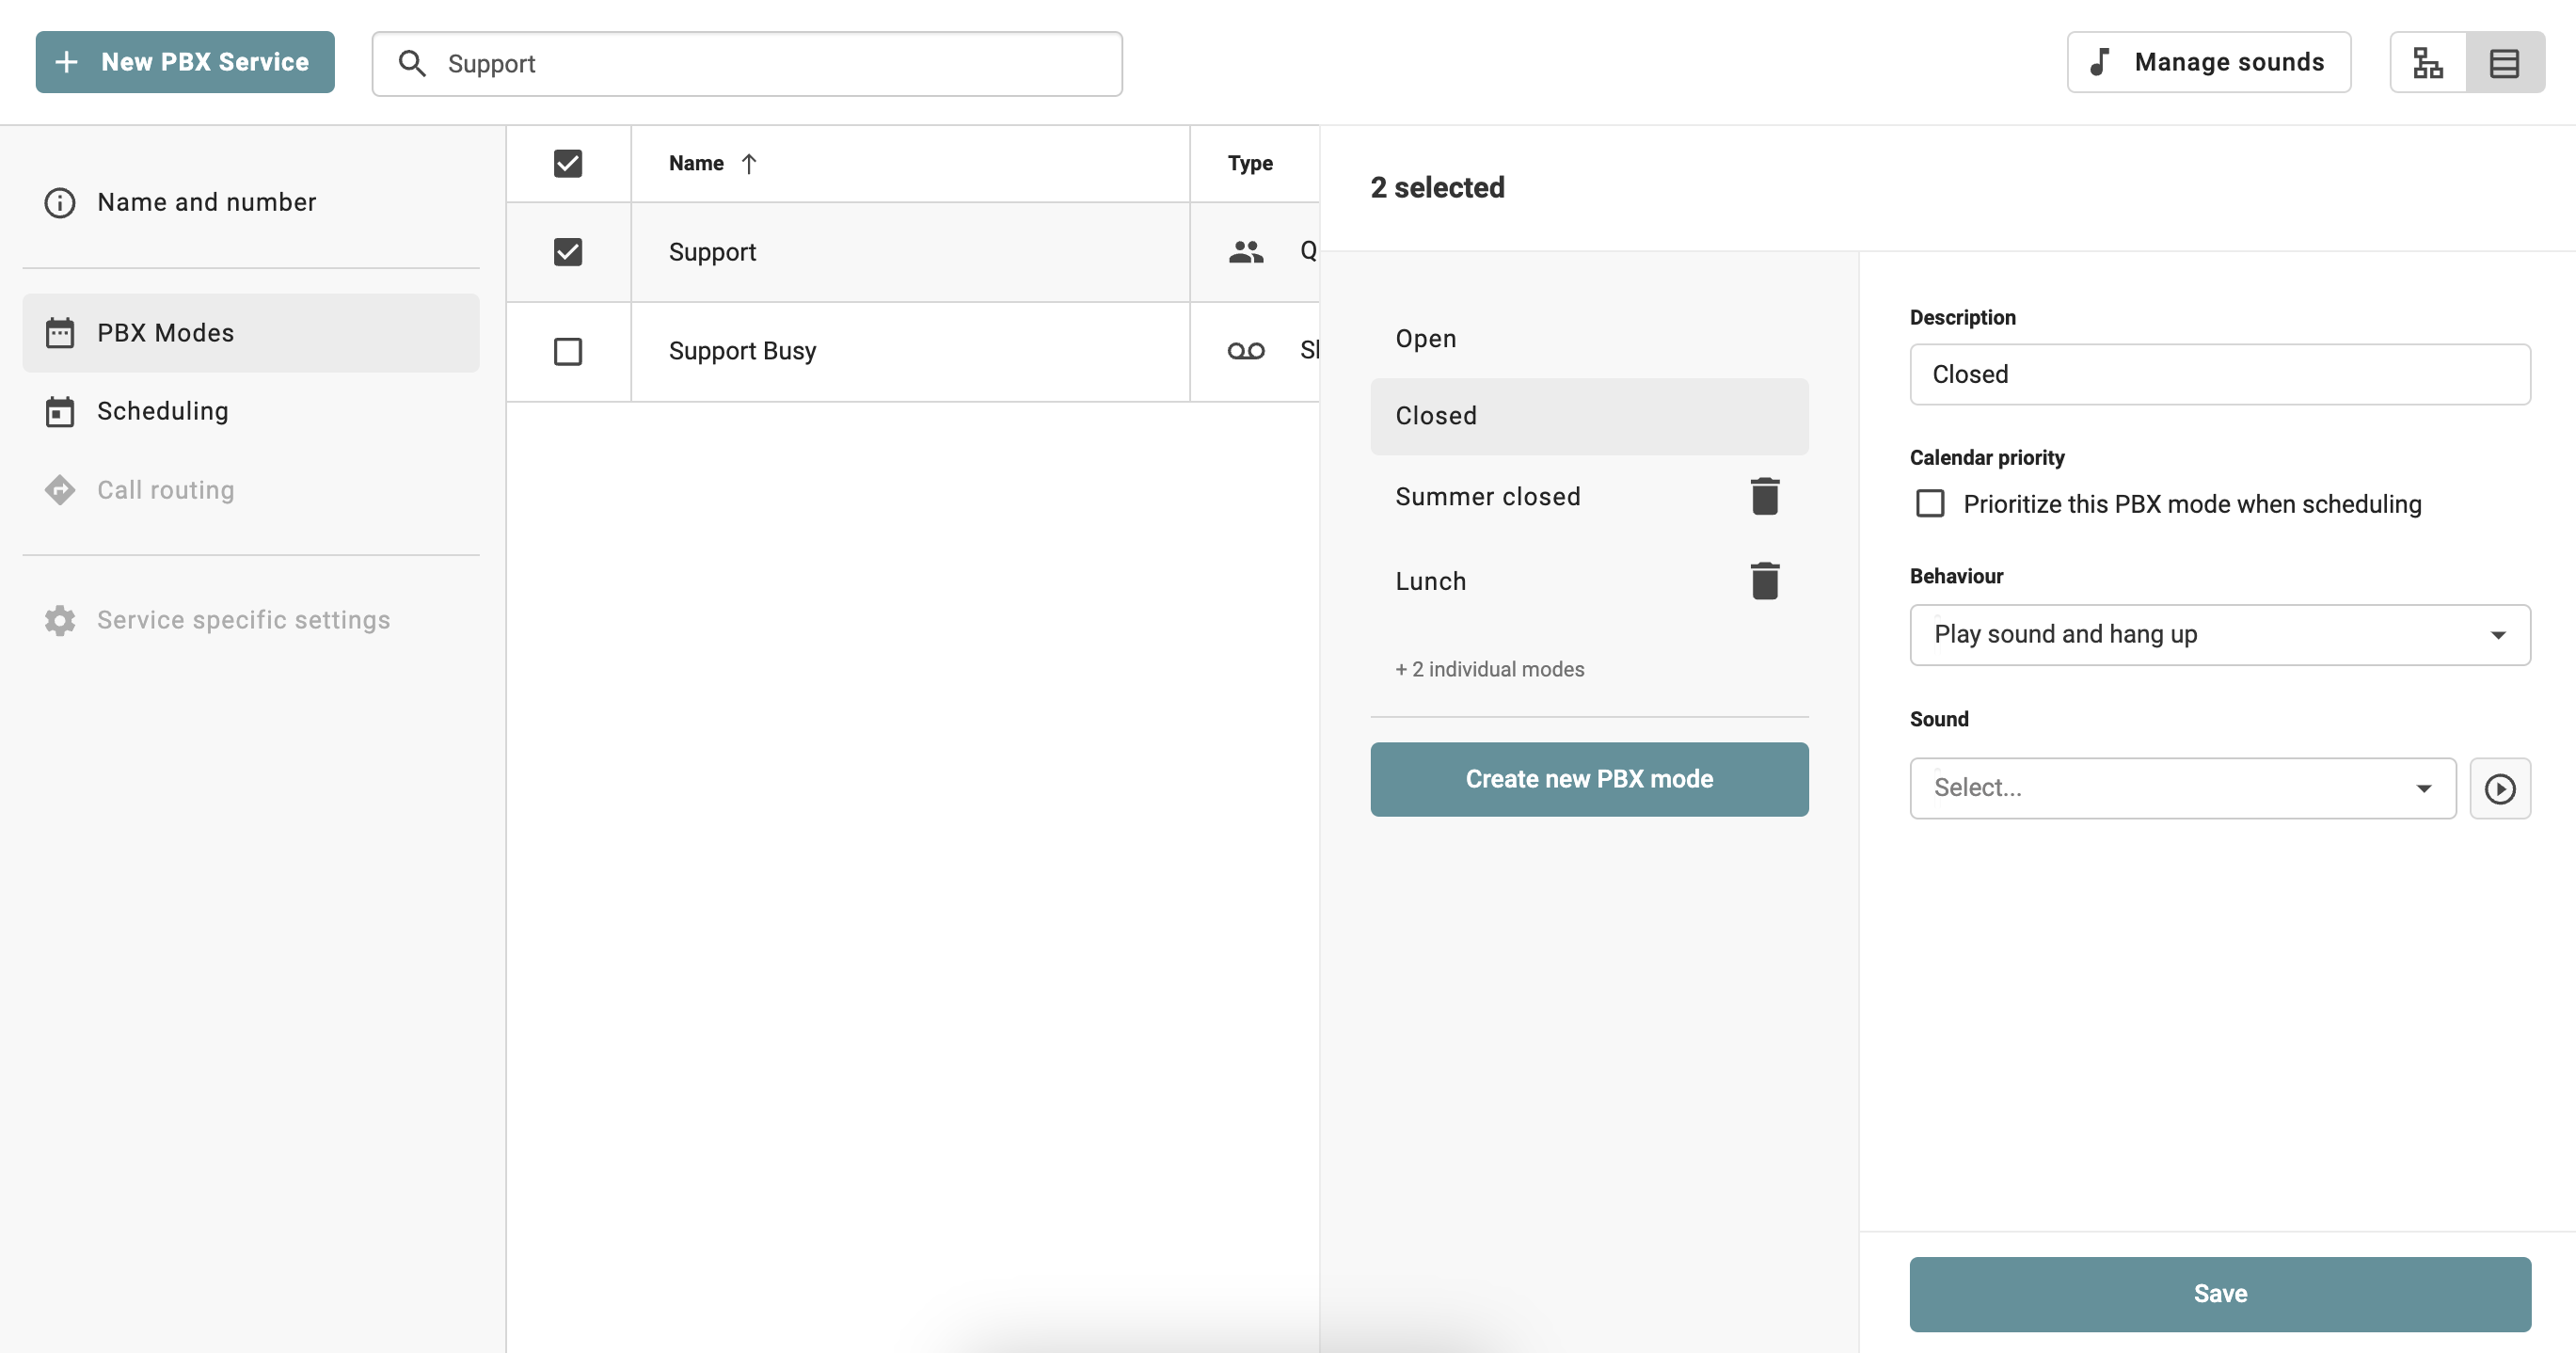
PBX Modes
- Under PBX Modes, you can change the PBX settings of the PBX mode, such as Calendar priority, Behaviour and which Sound should be played. You can also create a new PBX mode.
- If you mark one or multiple services, you can mass edit the PBX mode's settings or create new modes.
Delete
Scheduling
Under Scheduling, you can add a Custom events and Holidays to your PBX services. If you mark one or multiple services, you can mass edit the scheduling of the events.
Custom event
- Click on Add event.
- Choose the PBX mode in which you want to mass edit.
- Choose from what start and end date you wish this PBX should be activated.
- Under Recurring, choose whether the event should be a one-time event or repeat, for example, every second week. You can also choose an end date for the event under "Recurring until".

Holidays
- Click on Add event.
- Choose the PBX mode in which you want to mass edit.
- Choose the Country.
- Select one or multiple holidays in that country.

- Choose from what start and end date you wish this PBX should be activated.
- Under Recurring, choose whether the event should be a one-time event or recurring every year.

Call routing
- Go to the Call Routing tab in the left side panel.
- Select the specific PBX service where you want to add the speed dial.
- Click on New Speed dial under Call routing.
- Enter the numbers.
- Once the details are filled in, click Create at the bottom.
